
A homemade wind generator from a bicycle wheel.
Author: Ted Baer.

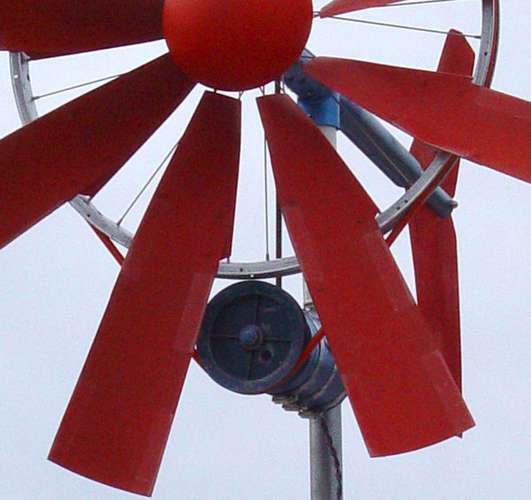
Ted Baer is the inventor of a series of small wind turbines designed for use in developing countries. These wind generators are simple and powerful enough. Aluminum windmill blades are made of soft aluminum strips, which are often used in the manufacture of suspended ceilings. To increase the rigidity, two 40 cm sections are fastened with rivets to form a single blade. The blades, in turn, are fixed on the spokes of the bicycle wheel. The resulting design can be seen in the pictures.
The generator, which uses a permanent magnet motor, and the ultraviolet-resistant drive belt, is purchased at any suitable store. The output current, reaching 2 amperes at a speed of 20 km / h (at 18-20 volts), will be enough to compete with the energy received from solar panels (of course, in the presence of wind). The total cost of the self-made wind generator amounted to less than $ 80 for the author and this despite the fact that almost all the spare parts were bought by new ones. The most expensive of the components were a DC generator (about $ 30) and a UV-resistant drive belt (about $ 3-5 for 30 cm), which is used primarily in agriculture to drive conveyors.
The windmill is equipped with a tail unit (see picture). The tail beam is made of plastic PVC pipe. It is important that the design used only the rear wheel of a bicycle with a diameter of 24 - 27 inches. The wheel is attached to the end plug of the plastic pipe, in which a hole is drilled in the middle.
The generator was a DC motor with a working voltage of 24V, which was used in older computer models for drive drives. Such motors can be found on the old collapses of computer equipment, or even in some online stores. The following link leads to the page with more detailed information on the engines: http://www.otherpower.com/otherpower_experiments_tapedrivemotors.html
The generator is attached to the windmill using a conventional angle. You should get a solid shelf. The engine, together with the shelf, is secured with clamps. The pole on which the windmill is attached is at the same time a gutter for electrical wiring. On top of the metal pole on which the windmill is attached, a small piece of PVC pipe is screwed, which contacts the plastic of the windmill case, i. A bearing is produced - plastic on plastic.
The weight of the tail of the wind generator is selected from such a calculation that it will balance the entire structure. The designer of the windmill, Ted Baer, used the right amount of one-cent coins to counterbalance the entire structure. And what else are they suitable for? 
Testing
As a test site, a Windstar car was used, with a sled at the top for attaching the trunk and an installed platform. As a tripod for mounting the windmill, a set was used to mount a TV antenna on the roof of buildings. The indicators of wind speed, voltage and amperage were removed and recorded on a digital camera. The resulting video, unfortunately, the author has not posted for general review.
(The inscription on the photo below: 2A, 16V, 32W at 20km / h.


Mounting blades
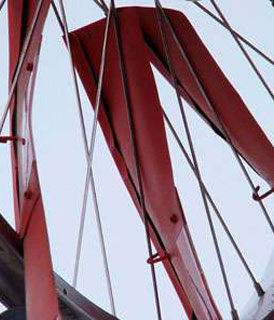
The blades of the self-made wind generator are attached to the bicycle wheel by bending the aluminum around one spoke and engaging the curved pin around the other knitting needle. A hook, or a curved pin, is inserted into the hole drilled on the windmill blades.

Details of wind turbine blade installation
 The picture shows in detail how the wind turbine blade is attached. The blade is bent around the knitting needle manually. To do this, you can use a piece of metal rod with a diameter of 3 mm. The aluminum material of the blade, which the author used, is somewhat thicker than what can often be found in stores. In case thin aluminum is used, the author proposes to fasten two sheets together (using rivets or double-sided scotch) in order to obtain a blade of sufficient thickness and rigidity. The blades of the self-made vertex can also be made of wood (3 mm plywood, veneer) or plastic.
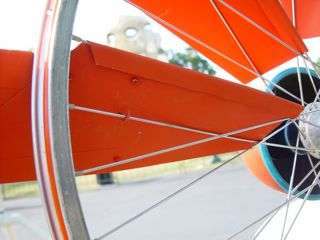
Drive Belt Generator
In the photo, you can see in more detail the attachment of the wind generator, belt pulley and the drive belt itself.
There are many varieties of self-made wind generators. Here is presented the most successful design in terms of output power. It uses two wheels and two generators. In general, give free rein to your imagination.

And here is presented a version of a self-made vertex with one generator. A plastic horizontal beam, connecting both rotors of the windmill, should be reinforced with a metal pipe. A good balance of the entire structure of this windmill is achieved by placing the generator as close to the center of the axis of rotation. Need more power ...? Add a bicycle or simply open a mini farm with self-made wind generators.

The 5-way fitting supports the horizontal and tail boom of the windmill. The horizontal beam is reinforced from the inside with a metal pipe, which gives the structure additional rigidity. At the top of the entire structure is a 3-way fitting, cut off in such a way that it forms a shelf for attaching the generator, which is pulled to it by clamps.

Watch the same topic:
Wind generator with own hands.
Homemade windmill with blades made of aluminum pipe with a homemade generator
Windmill 1.6m with your hands.

Comments
When commenting on, remember that the content and tone of your message can hurt the feelings of real people, show respect and tolerance to your interlocutors even if you do not share their opinion, your behavior in the conditions of freedom of expression and anonymity provided by the Internet, changes Not only virtual, but also the real world. All comments are hidden from the index, spam is controlled.