
Yevminov's board with his own hands
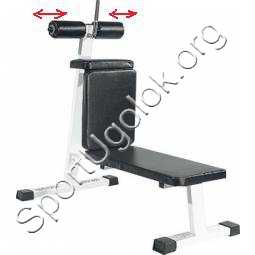
Many familiar problems with the back and in conversations with them often pops up the theme of Evminov's board. This is some kind of magic bullet, classes on which solve almost any problems with the back. That's just it is very expensive. Many dreamed of making it with their own hands. I found and spread for them a description and a detailed manufacturing technology with photos.
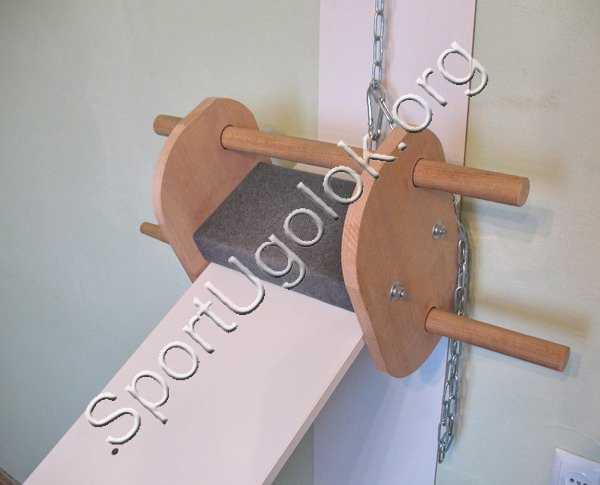
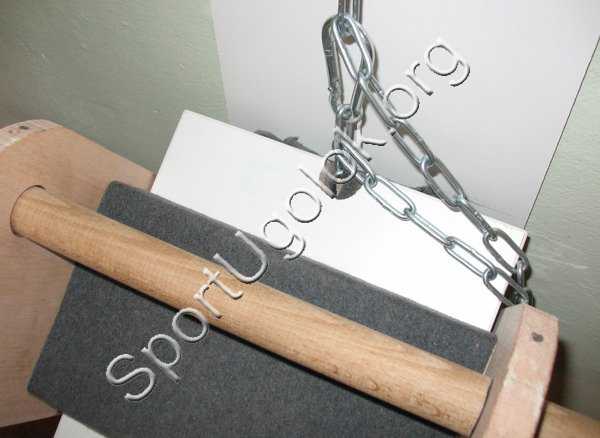
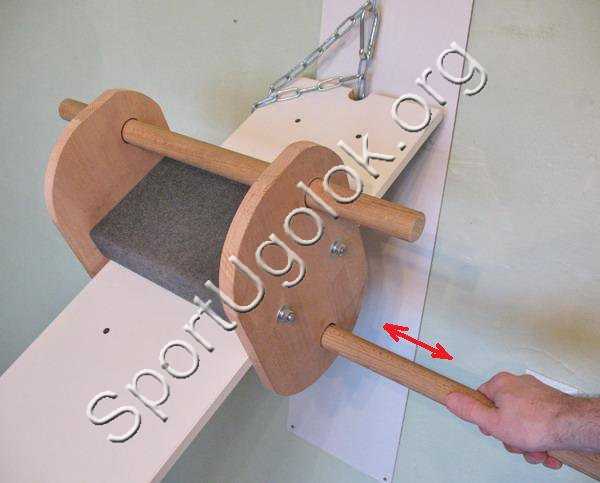
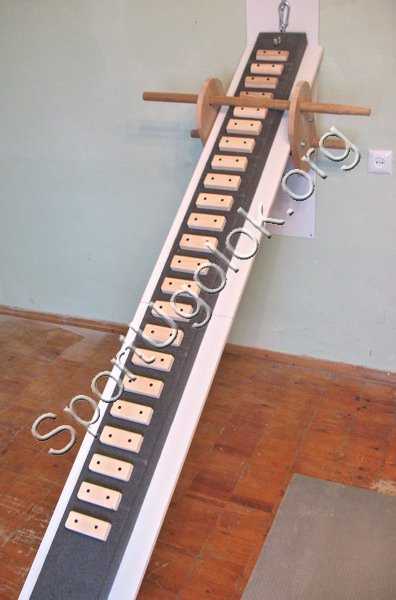
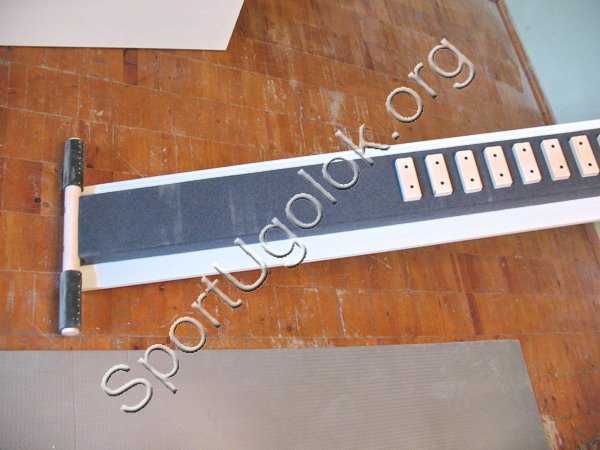
General view of the board. The board is easily adjustable by tilting to the wall. The position of the carriage on the board is also easily adjustable with one hand without an additional tool. There are all the characteristics of the original board.
Carette close-up. The strength is tested in practice: it can be used as a horizontal bar for a person weighing 80 kg, pulling up without jerking.
Board base
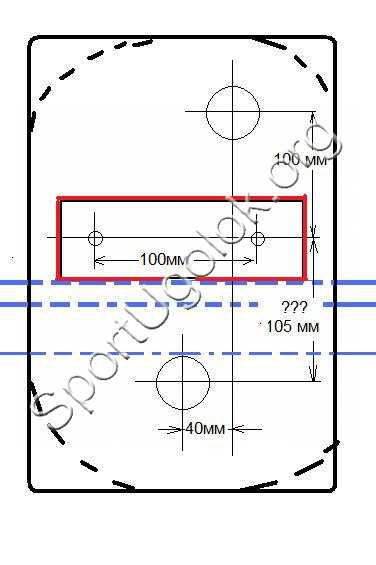
Drawing:
What you need to buy:
We go to the building supermarket and buy:
Beam pine not rough 50х150х3000. For those who are not familiar with the topic - this is a long, strong wooden board, relatively cheap, used for rough construction works. It is not hewn. In order to put it in order, you will need an upholstery fabric, but more about this later. In the photo, the cutoff of this bar.
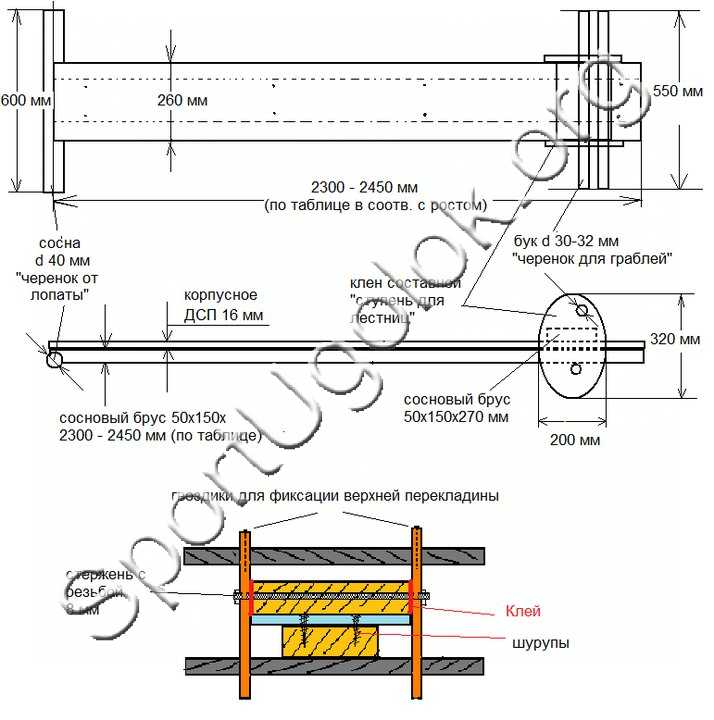
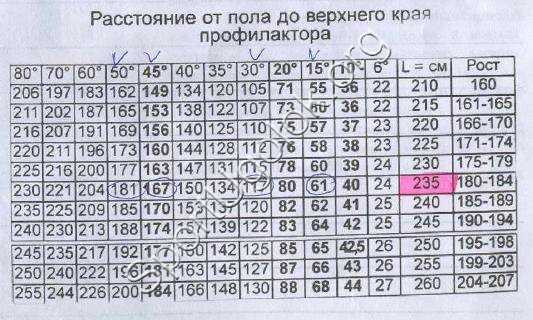
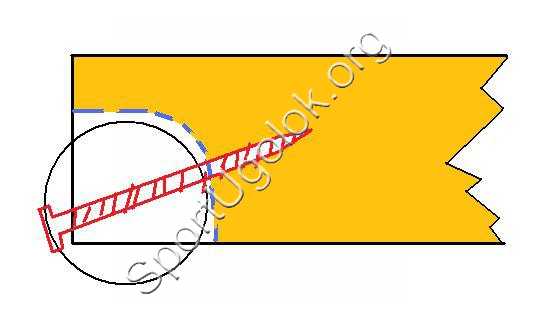
We order the cutting of this bar so that you will do it qualitatively strictly perpendicular to the circular. Make 2 pieces: the first piece of the length that corresponds to your height (see the attached table from the manufacturer in the photo). Second piece 270 mm
The next step is to make the work surface. Dimensions: 260mm wide and long as long as you chose on the table for your growth.
I made of pieces of a furniture chipboard (a board of glued sawdust) of white color with a thickness of 16 mm, which I already had on the farm.
Usually, EAF is sold with large slabs of 2.5 x 3 meters and in our case it does not make sense to buy an entire plate. You can use the doors from the old closet or something from the household or buy the rest of the chipboard in the same building supermarket in the wood processing department. There often remain pieces from large orders. The surface does not have to be integral. The carrier will be made of a wooden beam. You can take a few pieces of the right size and order a 2mm plastic edge around the perimeter. It turns out very well and cute.
Remember: the main task of the working surface is to be slippery, smooth and do not absorb moisture
Then we buy cuttings for shovels and hoes. One shank for a shovel 1 meter long, in diameter somewhere 40mm will serve as a crossbar at the base. It can be made of soft wood. The second stem in diameter of 30 mm in length of 1,5 m, conically-like is ground from one end, a solid tree, Beech.
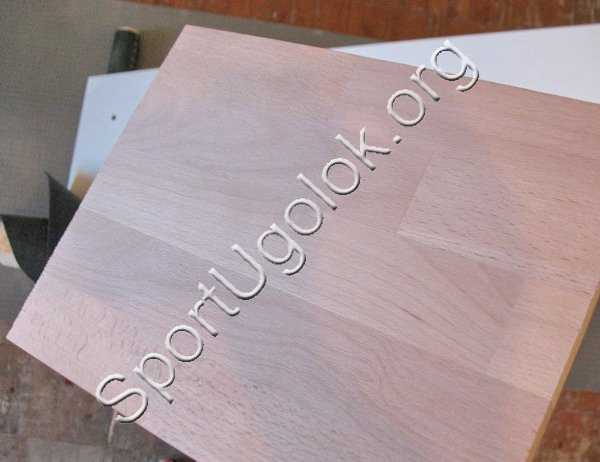
Then we buy a board from the category of a step for stairs. The carriage's edges will be made from it. It should be solid made of solid wood to withstand the weight of a person. I used a maple maple 200x900 mm, the remains on the photo
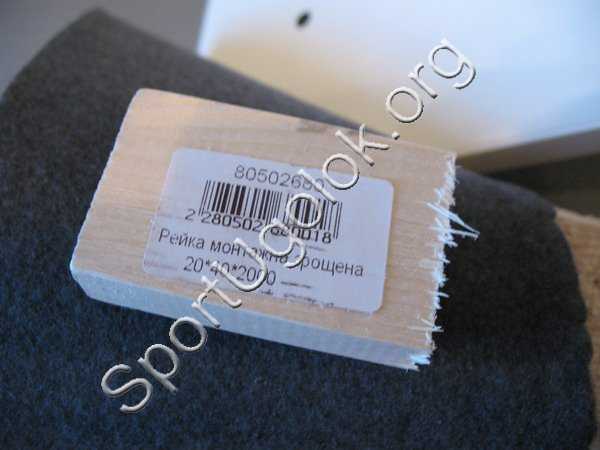
And we also select one rake mounting short 2х40х2000 (the remainder on the photo)
Now go to the department of metal products and buy:
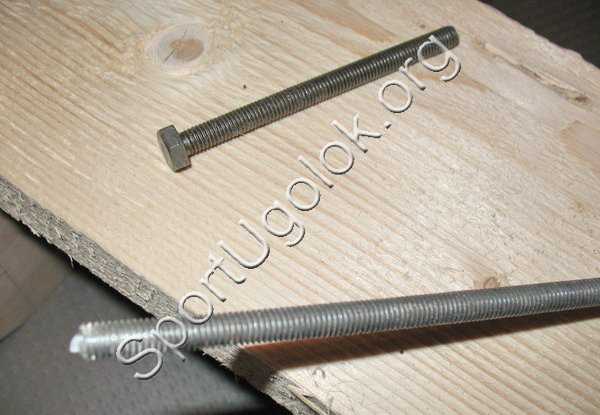
- 1. Bolt 8x70mm
- 2. A long metal rod with a thread, diameter 8 mm, a length of at least 660 mm (cut into two pieces of 330 mm)
- 3. Washers, nuts 8 mm, 5 - 6 pcs.
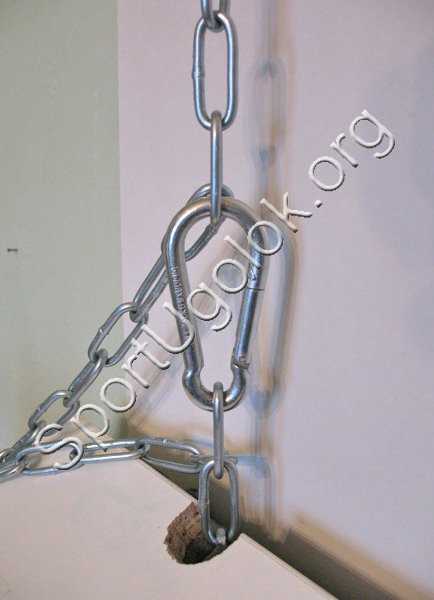
- 4. Long chain 4 mm, length 3 m (the board will be suspended on a chain.The factory board is suspended on a nylon rope which is also legible to buy in a building supermarket, but the chain is much more convenient for height adjustment - with a carbine fixed at the bottom of the board you can switch to The necessary link and easy to change the angle of inclination)
- 5. Screws 50 mm, larger
- 6. 2 screws for wood 6x100 with washers (for fixing the crossbar at the base)
- 7. Galvanized fire fighting carbine
- 8. Dowel spacer twisted (screw in the wall or ceiling)
We also need tires to break the crossbar at the bottom of the board. Rubber pieces in the building supermarket is not for sale. You can use a rubber hose, or buy it on a flea market.
Now a very important material that is not sold in the Epicenter - a fabric for breaking the supporting beam and the base of the carriage. In our case, the cloth from the military greatcoat is ideally suited. It is dense enough not to gather in creases under the influence of loads and damping to relieve us of unnecessary scratches and also to be a sealant in the process of locking the carriage on the board. As an alternative, cashmere comes from an old coat.
With the materials finished, now we proceed to manufacture.
For work from the basic tools it is enough to have a drill, saw on a tree, a knife for metal, a hammer and a set of drills.
We make a foundation. We saw off a piece of shovel shaft 600 mm long. Cut out pieces of rubber, we tighten the ends of the crossbar, nailed the carnations. At the fixing point, we make holes and grooves for our screws on wood to drown them and do not scratch the parquet.
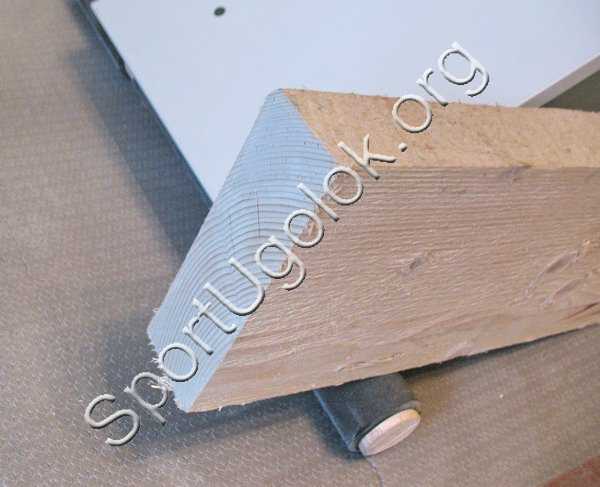
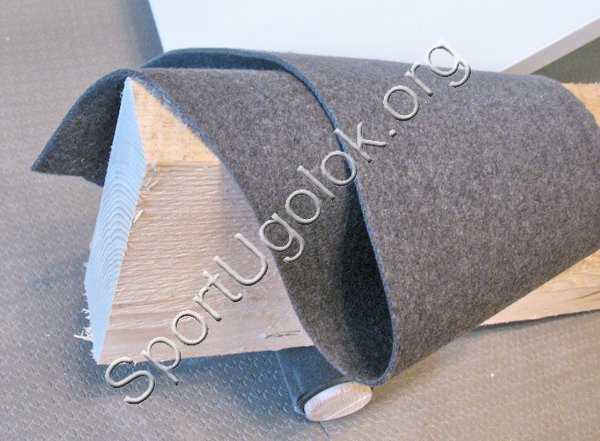
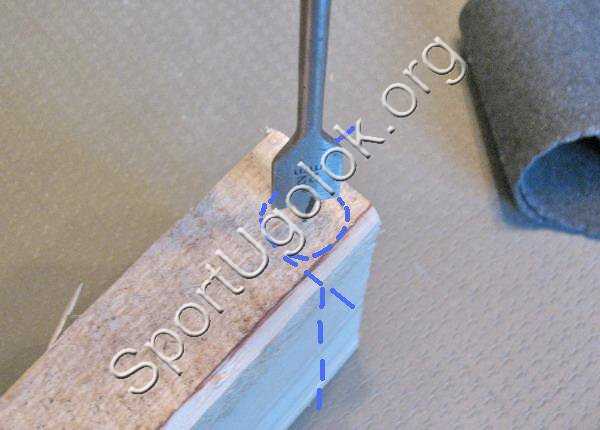
Now we prepare the beam: it is necessary to cut a piece of timber from one end (blue dotted line), then to drown our crossbar into it.
To do this, we take the milling cutter on the tree and from the ends we drill the bar through and then cut the jumper from both sides
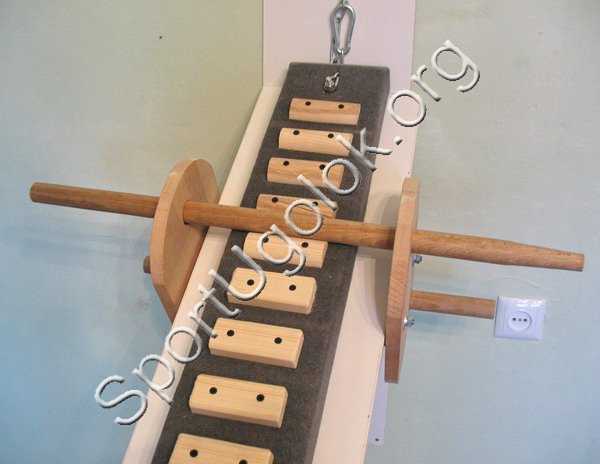
Now we are fixing the chain from the opposite end of the bar. The chain is attached below and goes up through the through inclined opening. Overall plan.

Bottom view
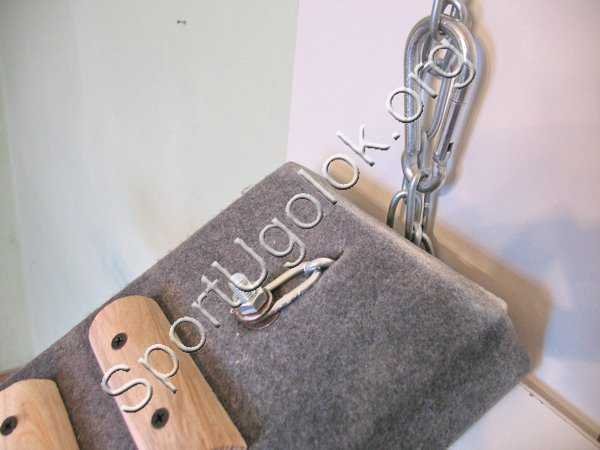
View from above. It is necessary to cut a semicircular groove from one end on the working surface of the chipboard so that the chain can pass freely
Now we cut out a piece of cloth, wrap it with a supporting bar so that the edges fall on the upper part, which will hide under the bearing surface and peg it with such a stapler as in the photo. If there is no mounting stapler, a stationery will do. Beams of softwood

Now the assembly: we pass the chain, we fasten the crossbar to the base, screw the supporting surface from above to the timber with screws.
A spiral hook is attached to the ceiling or wall.
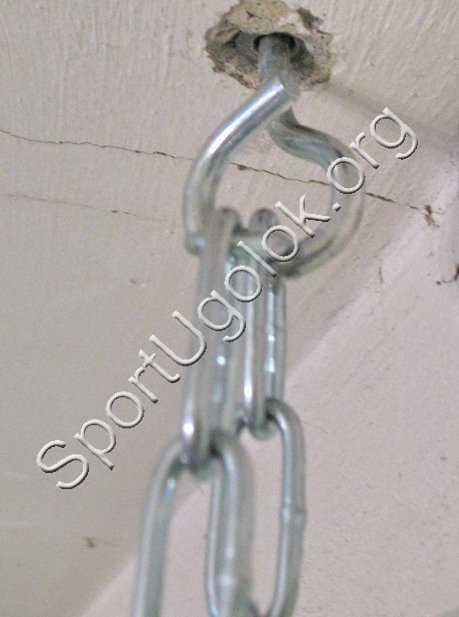
The finished board can be suspended and the angle of inclination can be adjusted by means of a carbine clinging to the desired link
Height adjust according to the table (see above)
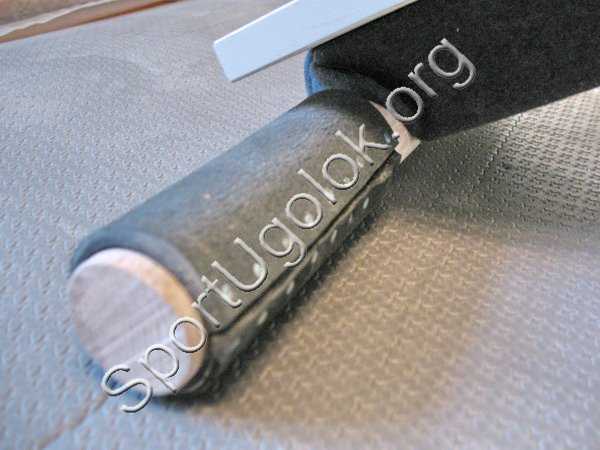
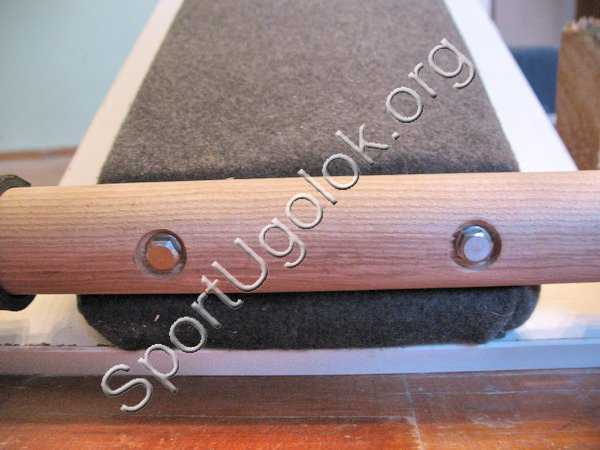
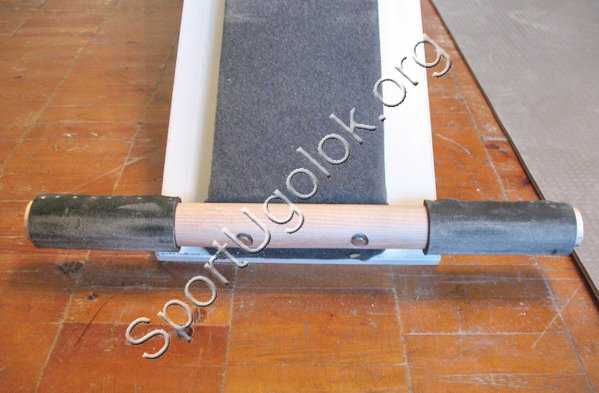
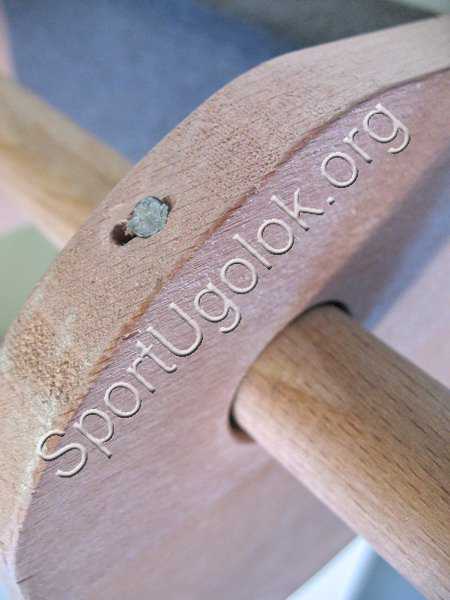
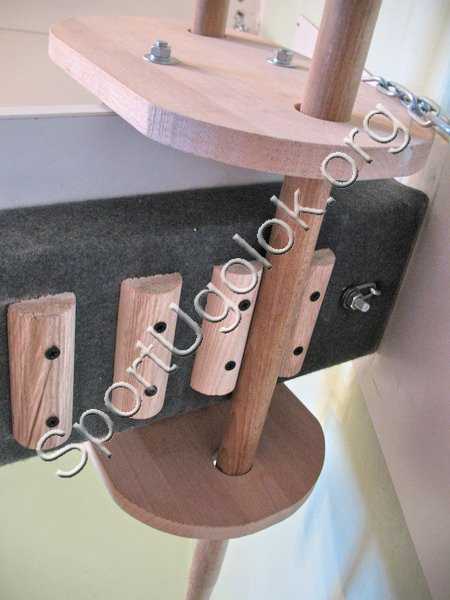
Now make the carriage. The maple glued board is cut into two identical pieces of 200x320 mm. It will be butt-ends. At the ends we drill holes under the cross-bars with a diameter of 32 mm. All dimensions are specified exactly except where ???. It depends on the thickness of the fabric (red), which you will tighten the base of the carriage and the supporting bar (blue). With the cloth from the overcoat, it turned out 105 mm, but here it's important to measure out already on the spot so that the carriage is fixed tightly without a blubber.
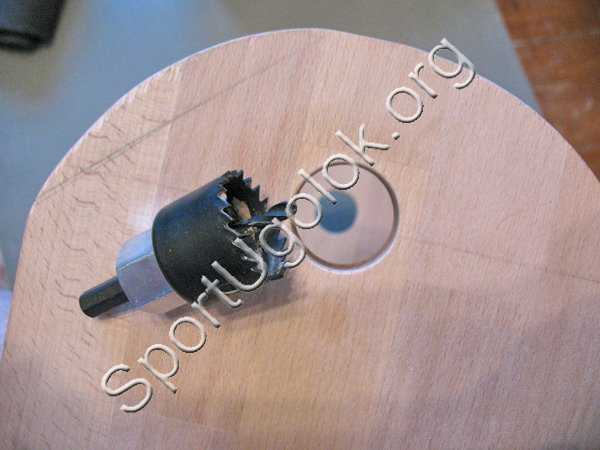
For drilling holes for the crossbeams we use a special tool
We prepare the base of the carriage. Take a short piece of bar (270mm) and drill two through holes 9 mm for metal rods 8 mm. If there is not such a long drill, drill from both sides for how long the drill is enough, and then from the ends drill a groove (shown in red) in order to connect the two channels together and pass the rods through.

Be sure to put the ends on the glue. Moment will do. We connect all together and tighten the nuts. We cut the base with a cloth and let it dry out with glue. Do carefully and carefully, observe all right angles and securely tighten and glue. This section will withstand the greatest loads.
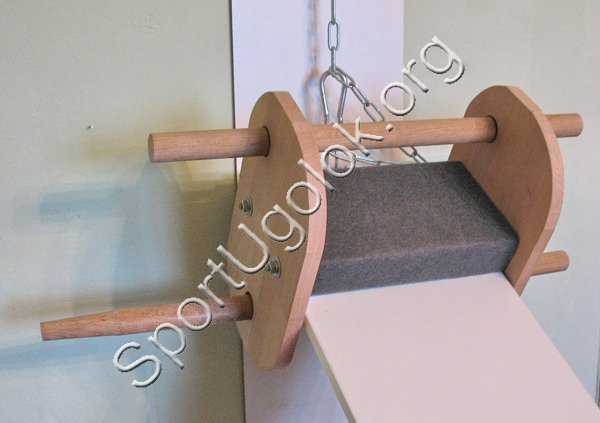
Complete carriage assembly
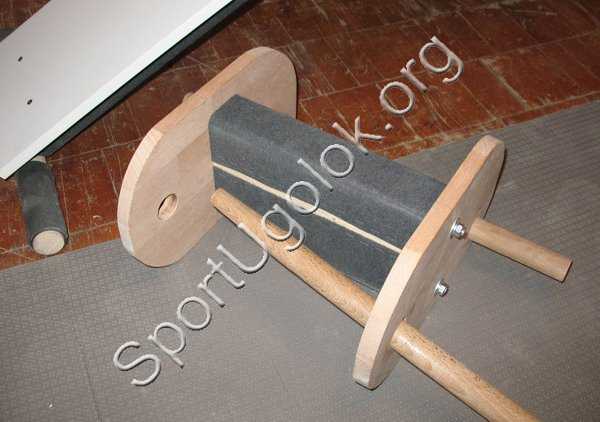

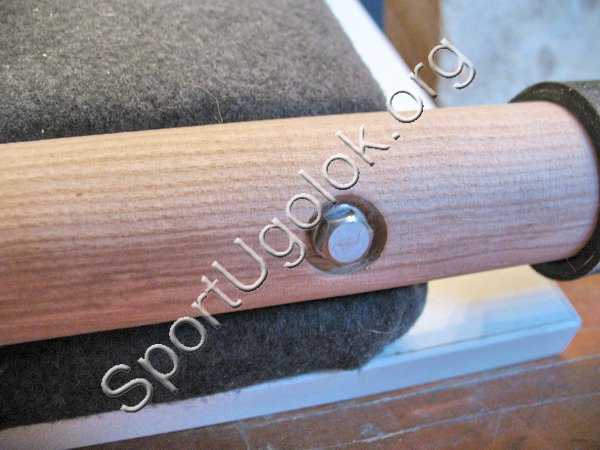
The upper crossbar, 550 mm long, is rigidly fastened to carnations scored at the ends
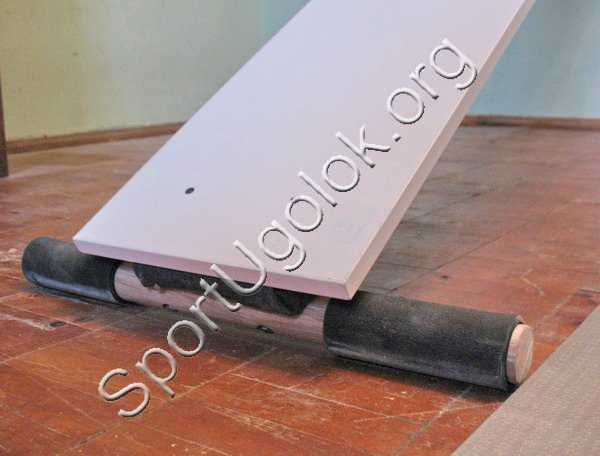
The lower crossbar has a free stroke
For the carriage to roll down, cut our mounting rail slices and screw it with an equal step along the entire length of the supporting beam from below under the board

All materials, except for upholstery fabric and pieces of rubber, are sold in a building supermarket.
As a result, about 200 UAH + some materials from the household were spent on materials, cutting and gluing the edge. It was a pleasure to do a well done job, and a thing made by one's own hands causes a desire to practice more often on this simulator, which is a prerequisite for a good result!Finally, I want to add that for lessons upside down, to cling to bare feet for rigid crossbeams is not convenient. You need to wear some shoes. By the way, all the photos from the center of Evminov customers are engaged in sneakers.
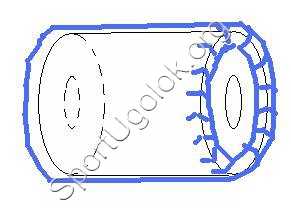
For the convenience of home lessons barefoot, you need to make four soft nozzles as in professional simulators and wear them on wooden crossbeams before you cling to your legs.
In the basis there will be also a tree, and from above to tighten a dermatitis or a skin with a soft lining inside. In the figure, the dermatitis is schematically marked in blue.

That's all, the board is ready! All the work I did with a strong back pain, so the quality of performance was in second place, in the first place were cheapness, simplicity of production and reliability, as in the Kalashnikov assault rifle
You can pay more attention to quality, grind the wooden parts nicely, cover them with varnish, use a different coloring cloth, and the chipboard select any color and structure for your interior. You can also polish the supporting beam and cover it with varnish, but it takes time and a healthy back. For the convenience of studies on the board itself, you can put the usual tourist car. Then lie on it softly and comfortably. Experiment!
If you do it yourself, upload photos of your versions.
All health and successful construction!

Comments
When commenting on, remember that the content and tone of your message can hurt the feelings of real people, show respect and tolerance to your interlocutors even if you do not share their opinion, your behavior in the conditions of freedom of expression and anonymity provided by the Internet, changes Not only virtual, but also the real world. All comments are hidden from the index, spam is controlled.