
Manufacturing of printed circuit boards using a laser printer.
Very often in the process of technical creativity it is necessary to produce printed circuit boards for the installation of electronic circuits. And now I will talk about one of the most, in my opinion, advanced ways of manufacturing printed circuit boards with a laser printer and iron . We live in the 21st century, so we will facilitate our work using a computer. We will design a circuit board in a specialized program. For example, in the program sprint Layout 4 .

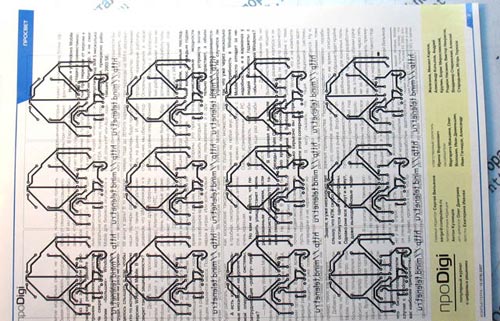
After that we need to print the drawing board. To do this, we do the following:
1) In the printer settings, turn off all options for saving toner, and if there is an appropriate controller - set the maximum saturation
2) Take an A4 sheet from an unwanted magazine. The paper must be coated and preferably a minimum of the picture on it.
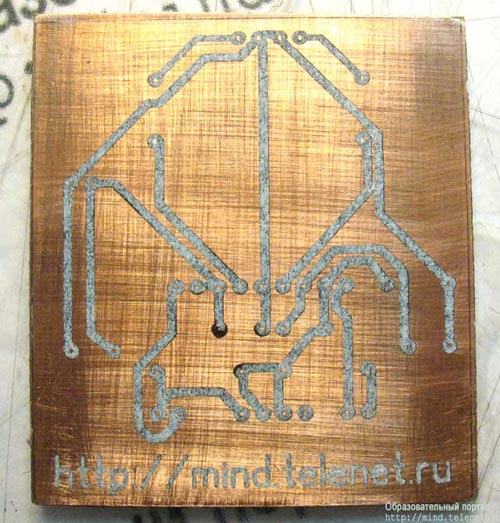
3) Print the printed circuit board on coated paper in the mirror image. Better at once in several copies.
We will postpone the printed sheet for the time being aside and prepare the board. As a starting material for the board can serve as a foil sheath, foiled textolite. With long-term storage, copper foil is covered with a film of oxides, which can interfere with etching. Therefore, we will begin preparing the fee. With a fine sandpaper we rip off a film of oxides from the board. Especially do not be zealous, the foil is thin. Ideally, after stripping, the board should shine.
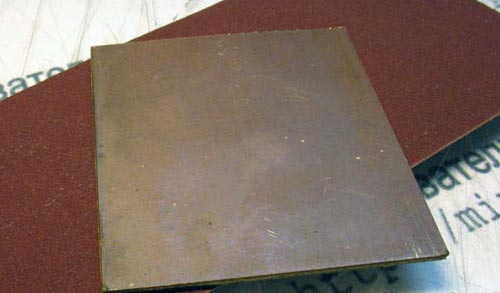
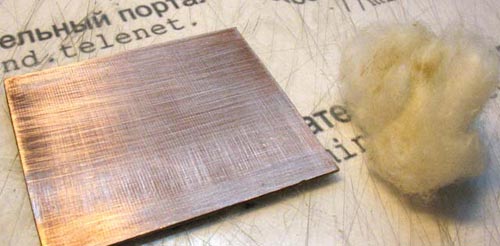
After stripping, the board is washed with running water. After that, you need to degrease the board, in order that toner stuck better. Degrease can be any household detergent, or washed with an organic solvent (for example, gasoline or acetone)
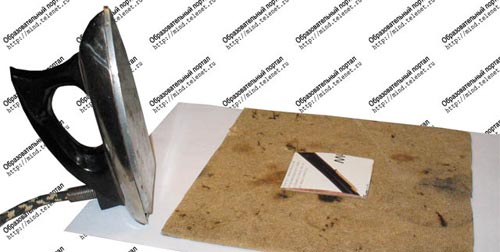
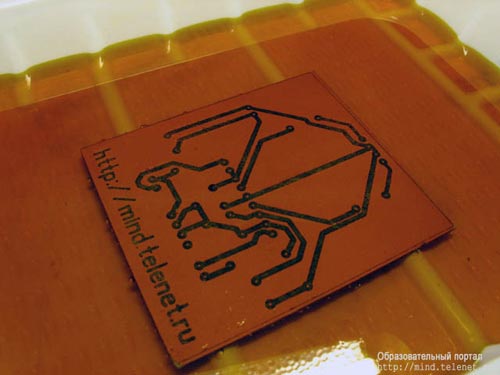
After this, using an iron, we translate the picture from the sheet to the board. Put the printout on the printed circuit board and start ironing with a hot iron, evenly warming up all the boards. The toner will start to melt and stick to the board. Time and effort of warming up are selected experimentally. It is necessary that the toner does not spread, but it also needs to be welded all the way.
After the board with the piece of paper adhered to it will cool - we will wet it and we will roll it with fingers by the stream of water. Wet paper will collect in pellets, and the adhered toner will remain in place. Toner is strong enough and barely scraped off with a fingernail.
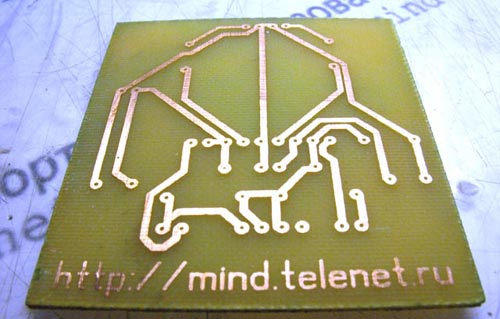
Etching of printed circuit boards is best done in ferric chloride (III) Fe Cl 3. This reagent is sold in any store of radio components and is inexpensive. We load the board into the solution and wait. The etching process depends on the freshness of the solution, its concentration, and the like. It can take from 10 minutes to an hour or more. The process can be speeded up by shaking the bath with the solution.
The end of the process is determined visually - when all unprotected copper is exposed.

The toner is washed off with acetone.
The last operation is still drilling holes. Drilling is usually done by a small motor with a collet chuck (all this is in the shop of radio components). The diameter of the drill for ordinary elements is 0.8 mm. If necessary, the holes are drilled with a large diameter drill.
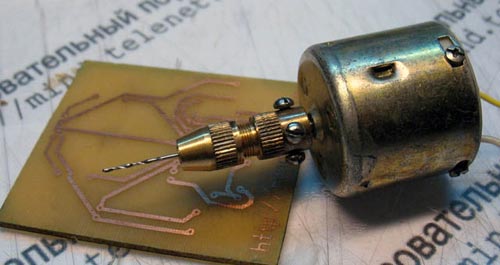
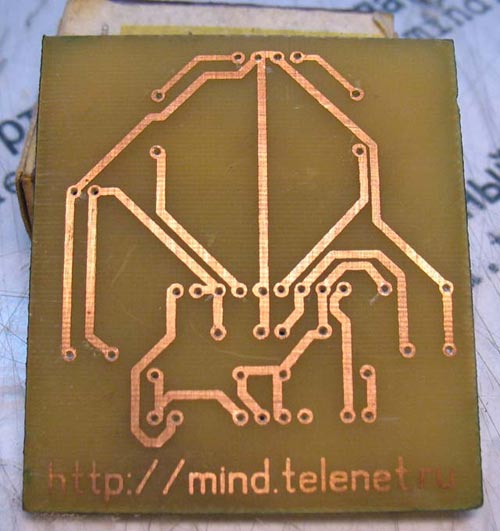
Ready drilled board, ready for soldering. As you can see, the appearance is practically indistinguishable from the industrial one. In addition, the laboriousness is minimal, and the materials are available (there is no need for specific reagents, as when applying photoresist)

Comments
Commenting on, remember that the content and tone of your message can hurt the feelings of real people, show respect and tolerance to your interlocutors even if you do not share their opinion, your behavior in the conditions of freedom of expression and anonymity provided by the Internet, changes Not only virtual, but also the real world. All comments are hidden from the index, spam is controlled.