
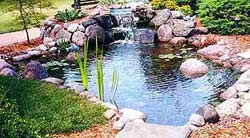
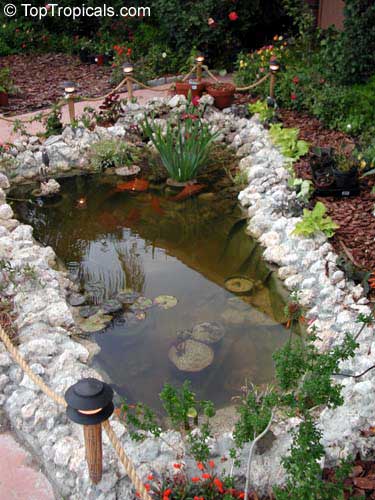
Decorative pond.
How it all starts ....
Everything begins with Idea. Mad (for many) or intrusive to others (including you).
Ideas about how to make a pond with fish and flowers, vooot such here, beautiful. After you have decided on the idea, decide on the purpose of the pond.
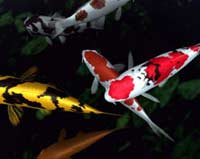 If you want to make a pond for koi, then you need to take care of large pond sizes, at least 2.4 m X 1.5 m and up to one and a half meters deep (at least 1.7 m for wintering).
If you are suitable for ordinary goldfish or any other, then the volume of the pond is limited by your imagination, and the depth is enough for 45-60 cm. If you do not have fish in the pond (although it is not worth it - mosquitoes are there - at least guppies are needed ), Then the pond can be made in any vessel.
1 - ledge for coastal plants;
2 - regulation of the height of the basket with water lilies by means of embedded bricks;
3 - the basket gradually descends to a greater depth as the stalks of the water lilies grow.
The size of the pond also depends on which plants will be used for decoration. If you prefer large water lilies, the depth should be at least 70 cm. For medium-sized plants, a depth of 35-45 cm is sufficient, and for very small water lilies 15-20 cm. For the Typha, Scirpus and the like can be limited to the depth At 10 cm.
Where to place a pond.
If you have a small garden, the pond is best placed as close to the house as possible so that you can admire it from the windows. It is more convenient from a practical point of view - it will be easier for you to bring electricity to it for pumps, fountains and lighting. It is desirable that alongside the pond there is a path - this will facilitate access to it during construction, and in the future - it is convenient for walking. Place the pond so that it is illuminated by the sun for at least part of the day; Over it there are no trees that drop leaves, flowers and fruits; Was outside the shadow of buildings and fences; Was protected from cold winds.
Of what to make a pond.
It is much easier to build a pond using rigid forms (stamped forms) - although this is not as easy as advertising sometimes says. The cheapest forms are made by the method of vacuum punching and their only advantage is a low price. They are short-lived, afraid of sunlight, corners crack over time. They are made of semi-rigid plastic and in a small range of sizes. It is much more reasonable to buy a more durable form of fiberglass. She is not afraid of fluctuations in temperature and ultraviolet. The warranty period is at least 20 years. When buying a rigid form, you are limited in choosing the shape and size of the future reservoir.
Only with the advent of high-quality flexible waterproofing coatings household plowing became truly affordable for every fan. With the help of flexible waterproofing, you can create a pond of any shape and size.
Currently, the following types of waterproofing coatings for water bodies are available:
Polyethylene film is a short-lived material, but a pond created from this type of coating will serve you for several seasons without any difficulties. Polyethylene film is a very affordable material. It is best to take a film of 150-200 microns with a stabilizer of ultraviolet light, which slows the process of destruction of polyethylene under the sun. Be sure to lay some kind of hard material under the film, which will protect polyethylene from contact with roots or sharp stones, which can disrupt the integrity of the coating. The author of this text, the very first pond was building exactly from polyethylene and for a season raised 12 beautiful comets in it.
A film made of low -density polyethylene is polyethylene, which is more resistant to destruction by ultraviolet rays. The service life is up to 5 years. So does the litter of hard material. The material is inexpensive and affordable for each user.
Polyvinyrchloride film - manufacturing companies guarantee the service life of this material to 20 years, which is proof that this material makes sense to use. The price of this material is from 3.6 to 5.4 USD. Per square meter. It is mandatory to use geotextiles or any other material that will prevent the rupture of the coating
Butyl rubber film - is made from waste products of the rubber industry. The guaranteed service life is 50 years. This is the most reliable and durable material from all film coatings. The price is from 5,4 to 7,6 cu. Per square meter. Sheets of material are very easily welded, manufacturers also sell repair kits, which allows the shortest time to eliminate water leakage due to a possible rupture.
Flexible coatings have a number of advantages: they are durable, withstand temperatures from -50 to +50 degrees, ponds can be created in any shape and size, do not require hiring highly paid professionals. However, for the normal functioning of such ponds, you need to buy biofilters that will help you fight the accumulation of fish products.
Where to get the filter.
Biofilter for such a pond is not cheap, although if you want, you can build such filters yourself.
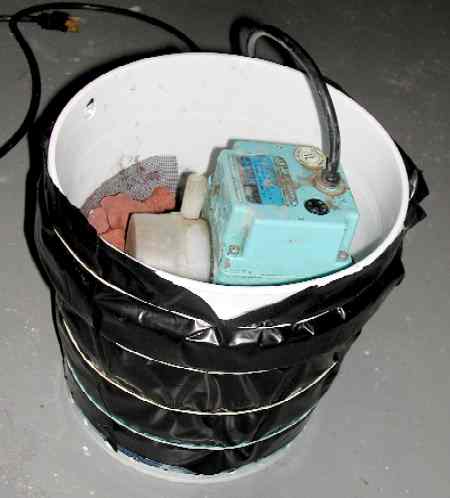
The filter was made from a plastic bucket from under the detergent powder. Below the contour, holes are drilled, closed from inside by a grid (a piece is visible). Filler - lava pieces (they have a porous surface, which is good for biofiltration) and simple gravel are poured into the bucket. Exit from the filter goes to the top of the waterfall. Water, draining over the stones, is filtered additionally. Black film around the bucket - so that it would not be so noticeable in the water. A pot of plants is placed on top of the filter. This filter, plus mangroves, plus a large number of plants, including marsh, which are more effective than water ones, in water purification, are quite capable of maintaining equilibrium in the pond.
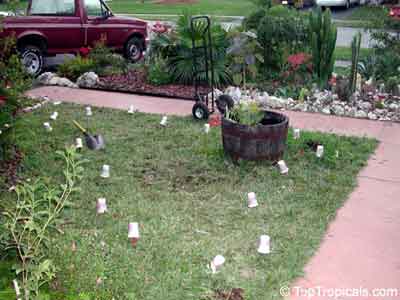
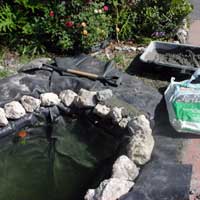
Where to begin.
Before starting work, we outline the contours of the future reservoir according to the developed design by a rope or garden hose. Digging a hole, we are guided by design elevations. It is necessary to make sure that the edges of the reservoir are leveled. The result is a foundation pit, in which the contours and profile of our reservoir are guessed.
To achieve a more close to the "natural" species takes time and patience.
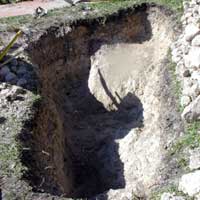 If your soil is loose and crumbling, then the walls of the pond make an incline. Although, after you lay the liner and pour all this with water, the walls will be held by the pressure of water. If you have clay soil, then make vertical walls.
Do not forget to make shallow "shelves" for plants.
Film laying .
After you dug a pond and measured it - you can buy a film.
Under the film it is recommended to put something that will serve as a soft lining. This is necessary if your soil contains a large number of sharp stones, etc. The simplest thing is to pour a layer of sand 5-7 cm. 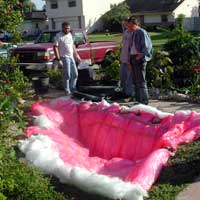
You can put a piece of old synthetic carpet. You can buy a special synthetic litter (geotextile), if you want that everything would be done "branded".
In this case, mineral wool was used.
On top of the geotextile waterproof geomembrane is placed from high-pressure polyethylene, or the rubber membrane EPDM.
Filling with water.
After the necessary materials have been laid, the trench is gradually filled with water; The geomembrane takes the form of a reservoir, and its folds, formed during the laying process, become invisible under the pressure of the existing water layer .; 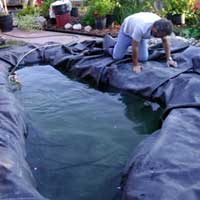
Do not cut the waterproofing before you filled the entire pond with water - suddenly you have to do something to remodel. Fasten one edge with stones, and leave the other so that the film can slide down under the water. If you laid it neatly, without sagging, then it should not crawl.
Fill slowly, straightening and squeezing the folds. If you notice any problems, then drain the water - do not move the film with water.
As the pond filled with water, continue to smooth the wrinkles - try to make a large crease instead of a few small ones. In the picture on the right - there are several large folds.
Construction of the embankment.
There are a lot of ways of fixing the film - simple and complex - using boards or with the construction of a granite embankment.
If you are making a "formal" pond, then the option on the picture on the left - fix the tiles or flat stones on the cement.
If you have a lot of stones left, you can use the option on the right.

Around around, along the perimeter, a groove is digging - in width and depth with a shovel. The edge of the film is placed on the formed shelf, on top there is a row of stones. Formed a ridge of stones laid out level with the ground level. From above, a bit of concrete is poured onto this ridge, and a concrete lining is laid out on this concrete.
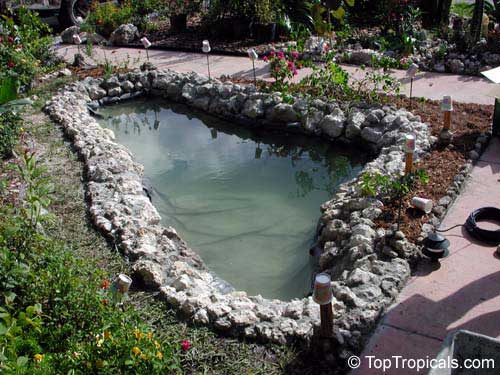
The border is finished, the film is once again clipped and hidden under stones filled with cement. The composition is completed by the planted plants.
That's all. As it turned out, to make a pond is not so difficult. Yes, it requires a lot of work, but the result exceeds all expectations. If you have everything organized in advance, then, in principle, a pond can be done in one weekend. So, go ahead.

Comments
When commenting on, remember that the content and tone of your message can hurt the feelings of real people, show respect and tolerance to your interlocutors even if you do not share their opinion, your behavior in the conditions of freedom of expression and anonymity provided by the Internet, changes Not only virtual, but also the real world. All comments are hidden from the index, spam is controlled.