
Stained glass windows, Tiffany's technique.
The necessary equipment and consumables for the manufacture of stained glass.
- colored glass;
- tin, brand POS-61;
- glass refill with a brass handle;
- special oil for glass cutters (substitutes - machine oil, kerosene)
- forceps for breaking glass;
Soldering iron, 100 W.
- grinding machine of the "Kristall" type;
- copper foil (black) 5.16 mm, another name - folia, from the English. Foil;
- flux or soldering fat, soldering acid;
- patina (black or copper);
- П - shaped brass profile 4х4х4 mm;
- brass rods, diameter 3-4 mm;
- protective glasses;
- Scissors for cutting out patterns;
- small scissors (can be manicure);
- small metal scissors;
- small nails, a hammer;
- wooden slats, 1х2 cm;
- a rigid brush;
- Scotch tape is wide, transparent and painter.
- writing paper. The more transparent, the better. But not tracing paper.
- Whatman;
- glue stick.
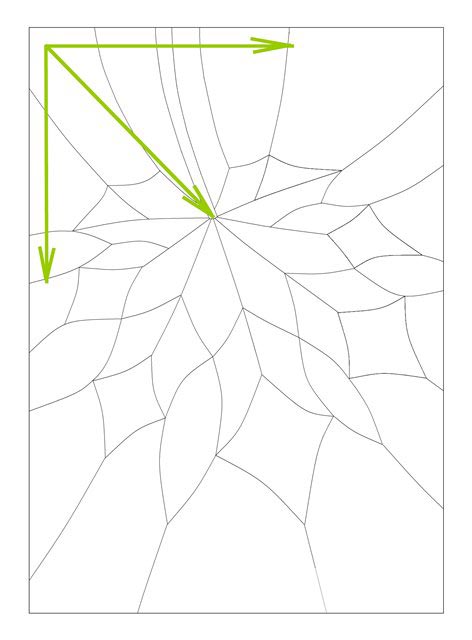
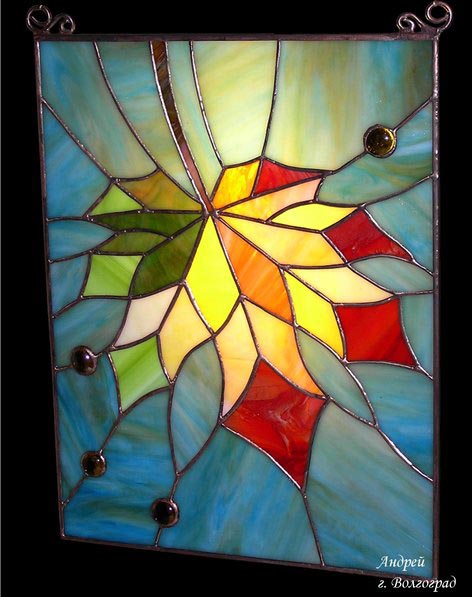
A sketch of a stained-glass window.
As a basis for the sketch of this stained glass is taken a real photo of a maple leaf. Since this work is done by the student, the lines of the drawing were simplified as much as possible.
General rules for constructing sketch lines:
- the more in the figure of the stained-glass window of T-shaped intersections, the stronger it is;
- if the stained glass stitches are planned to be wide, it is better not to make narrow long elements with very sharp corners. Firstly, wide folia will still cover a significant part of the surface of the element, and secondly, without enough experience, it is easy to overheat the glass until cracks form.
- If the stained-glass window is planned to be narrow and high, provide in a sketch smooth lines from edge to edge, for stiffeners.

The sketch of the stained-glass window is printed in full size in two copies, taking into account the margins (minimum 2 cm).
Each element is numbered, and one sketch is cut along the lines by special pattern scissors. These scissors have three blades. The central blade automatically removes a strip of paper 1.27 mm wide. In the future this strip is compensated by the thickness of folia.
If this is your first job, it's better to cut the templates with ordinary scissors, since having no experience in cutting and turning glass can easily be mistaken. The cut out element will be slightly larger than required, and this will allow you to correct the errors that occur when turning.
The surface of the working sketch is sealed with a wide transparent tape to protect the drawing from accidental water ingress.
Next, your sketch over the fields is pasted with paint tape to the work surface. The work surface must be perfectly even. Then on the future border of your stained glass wooden slats are beaten. As the stained-glass window begins to be made from the corner, gradually moving down and sideways, first mark the sides of this corner with racks.
The choice of glass.
Modern stained glass of American, European and Chinese production is distinguished by a great variety of texture, colors and shades. It is better to use American and European glass in work. Some companies selling glass, also sells its fragments. Pay attention to them. They cost considerably less, and will help to diversify the shades of your work.
When choosing glasses for stained glass, try to consider how your stained glass will be illuminated, how the texture and color of the glass are combined.
Manufacturing of the element.

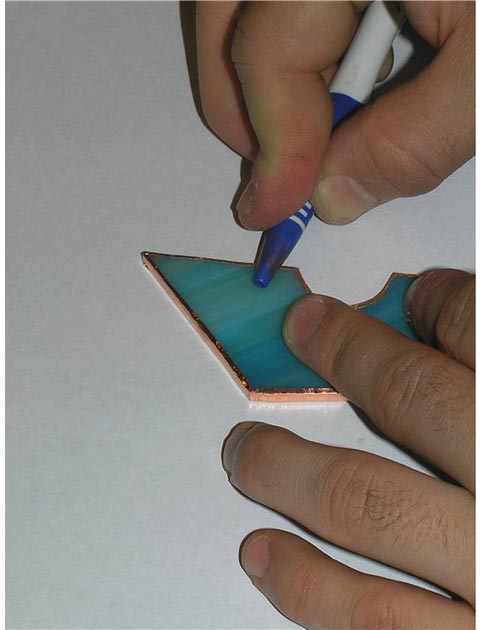
Cut the template element № 28 paste on a sheet of glass.
The sides of the glass sheet have a different texture. Cutting glass is easier on the smoother side. This, as a rule, is the "underside" of your stained glass window.
We cut the glass along the contour. The glass cutter should be held in the hand like a ballpoint pen, at an angle of 45? To the surface of the glass. Do not press on the glass cutter with all your might. The effort is small.
Try to keep the glass cutter evenly. The cutting roller must be perpendicular to the glass surface. If it is deflected, the chipped glass will go at an angle.
Cut glass from the edge to the edge of the piece, without interrupting. When you finish the line, lower the pressure on the glass cutter, otherwise it will be chipped. The lines should be smooth, without angles and s-shaped segments. If you want to cut an element with an arcuate side - break the arc into several relatively straight segments. The steeper the arc, the more these segments should be.
The grooves for the glass drops are ground on a sanding machine
After you carried a cutting roller over the glass, it formed a microcrack. A weak tapping by the end of the handle of the glass cutter (brass!) Along the cut line from the back side, leads to an increase in these cracks and a split glass.
If the piece of glass is small, this operation can be done in hands. If it is necessary to cut out a large fragment - put a sheet of glass on the edge of the table.
In order to break off a small or narrow fragment, use the forceps to break the glass.
Cut in this way a piece of glass is processed on a grinder. When grinding, always wear protective goggles!
The purpose of this treatment is final finishing by size, plus the creation of a rough surface of the edge of the glass, which is necessary for better fixation of the folium.
The working part of the grinder is the grinding head. The contact surface of the head and glass should be constantly wetted with water during operation. Otherwise, the abrasive surface quickly deteriorates.
Grinding heads are of different diameters and granularity: thin, standard and rough. Standard and coarse heads allow quick processing of the edge of the glass, but when using them, small chips are inevitable. They are invisible, if you use the wide folia that will cover them. If it is planned to make a thin seam in 2-3 mm, it is advisable to use a thin grinding head.
Grinding the glass, periodically apply it to your sketch, checking the fit of the size. It is necessary to take into account that after winding the size of the element will increase somewhat.
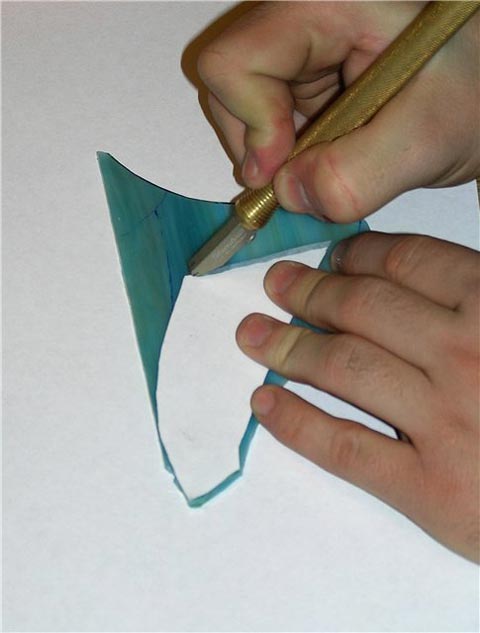
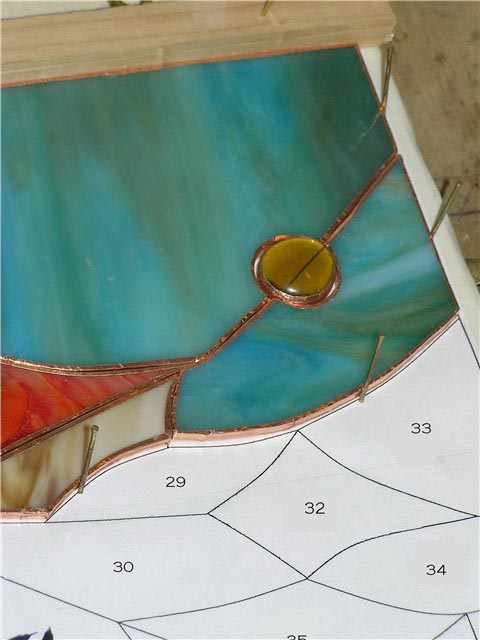
Winding the element with copper foil.
Each element of the stained glass window turns into folia. Folium is a copper strip of various widths, on one side covered with black or colorless glue. Depending on the color of the patina used, either "black" or "copper" folia is selected. This is important in the manufacture of products from transparent glass.
In order for folia to adhere well to the glass, it must be wiped dry and, if necessary, degreased.
Try to keep the folded edges of the foil the same width. Small irregularities can be corrected with a knife or a razor blade, but one should not allow large misalignments. This affects not only the aesthetics, but also the strength of the stained glass window.
After wrapping, folia should be smoothed over the entire surface. This can be done with a conventional plastic handle.
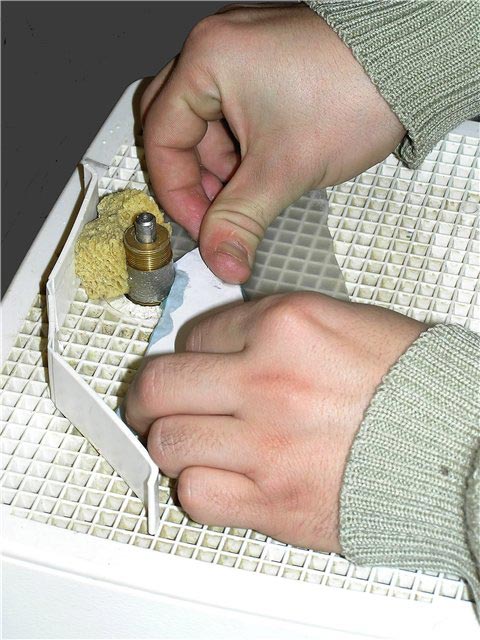
Fix the finished element on your sketch with the help of small nails.
Trying to achieve fine seams, do not try to adjust the details to each other "with a crunch." Elements should lie freely. Otherwise, during soldering, the glass can crack even when the heat is not too strong.
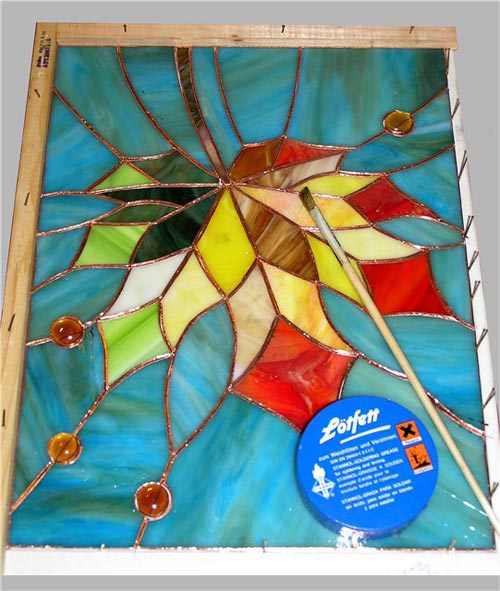
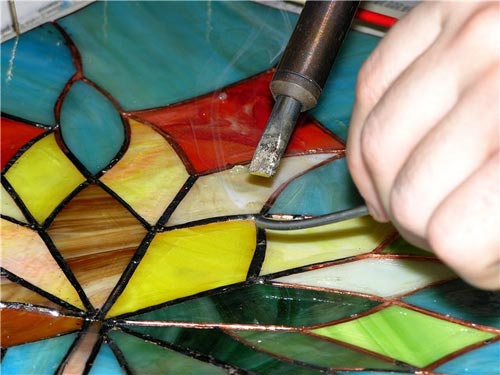
Further, all the seams are treated with flux. It removes oxides from the copper surface and promotes the liquefaction of tin. Each flux is good in its own way, but I prefer German soldering fat. It is applied to the seams with a brush.
If from the moment of winding up to the moment of soldering the surface of copper is strongly oxidized, soldering fat can be displaced with soldering acid.
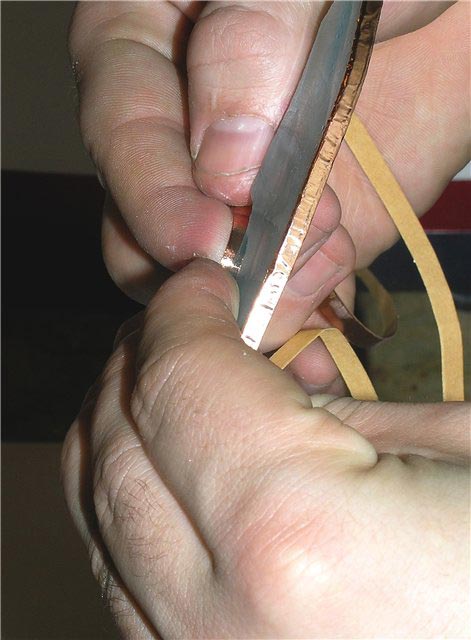
Soldering seams.
In the manufacture of stained glass, according to the Tiffany technique, tin of the POS-61 grade is used.
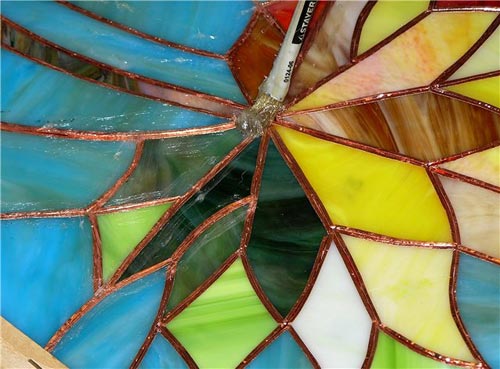
The tip of the tin rod is placed on the seam and pressed down on top with a soldering iron heated to the operating temperature. In this position, the soldering iron is conducted along the seam.
Do not hold the soldering iron for a long time in one place - you can overheat folia and glass.
The height of the seam you define yourself. With the amount of tin you need to be careful. Its excess can, of course, be "bumped" onto the glass, but if there is too much tin, the glass may crack.
Before soldering "clean", cover all the seams with a small amount of tin.
Defects of soldering correct immediately.
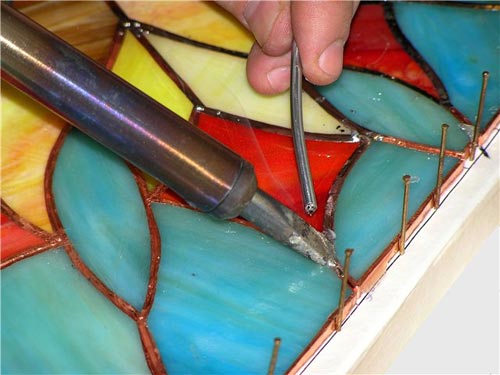
Since the stained-glass window will be framed in the brass profile, it is necessary to leave some length of seams around the perimeter unprotected.
After all the elements of the stained glass are welded together on both sides, a stained glass frame is made.
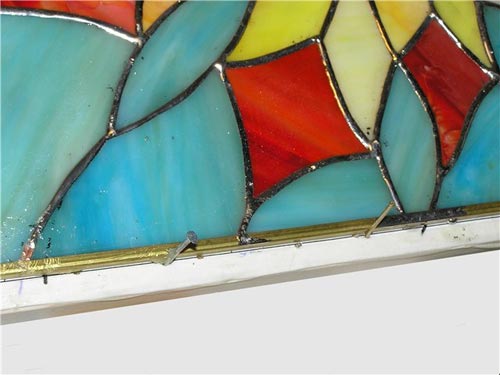
To do this, take a U-shaped profile: 4x4x4 mm or 8x4x8 mm, depending on the size of the stained glass panel. It provides a stiff enough frame for the stained glass window.
The profile is cut into lengths equal to the length of each side of the stained glass window. Then the edge of the canvas is inserted into the profile and soldered to it at the points of contact between the profile and the seams. For this, the stitches at the edges of the stained glass are left with the minimum amount of tin on them. The contact points of the sections of the profile also dissolve. Further, if necessary, the profile is covered with tin.
After completing the soldering, the stained-glass window should be thoroughly washed with running water, using a hard brush and degreasing agents such as "Fairies".
Application of patina.
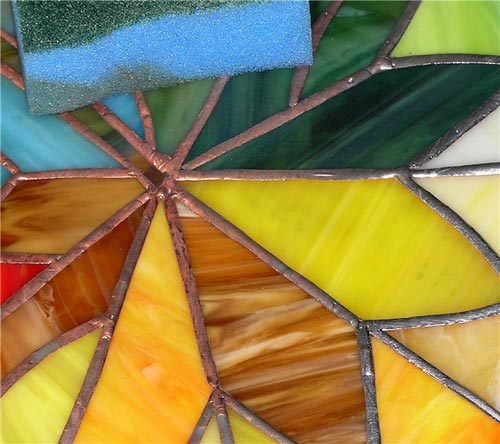
Patina is applied to dry, clean and low-fat stitches. Work better with gloves. From the main capacity, pour into the working small amount of patina.
Using a sponge, pat the patina on the seams. The remains of the used patina should not be mixed with the original solution, since its properties are lost. Further, the stained glass is washed with a soft sponge, using the means for cleaning the glasses.

Comments
When commenting on, remember that the content and tone of your message can hurt the feelings of real people, show respect and tolerance to your interlocutors even if you do not share their opinion, your behavior in the conditions of freedom of expression and anonymity provided by the Internet, changes Not only virtual, but also the real world. All comments are hidden from the index, spam is controlled.