
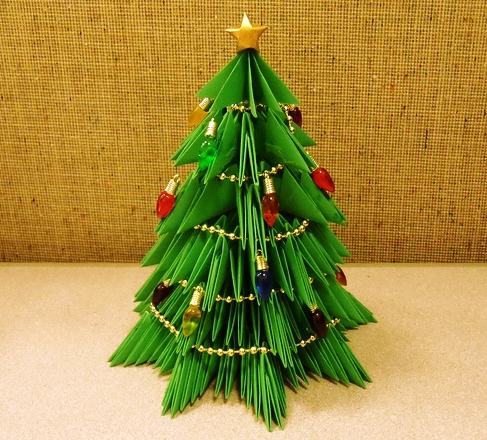
Fur-tree made of paper
Beautiful Christmas tree made of paper is very simple and fast! We need only take a sheet of colored paper and scissors. Such a Christmas tree made of paper will be a beautiful craft for holidays.
The herringbone made by own hands can decorate also self-made ornaments from small cones, nuts, beads, bows, tinsel of contrasting color. Buy small bells-toys and fasten them on a Christmas tree with the help of glue. To herringbone was higher, make a stand for it, for example, from a small flower pot: glue a circle of cardboard to it and already there fix the Christmas tree.
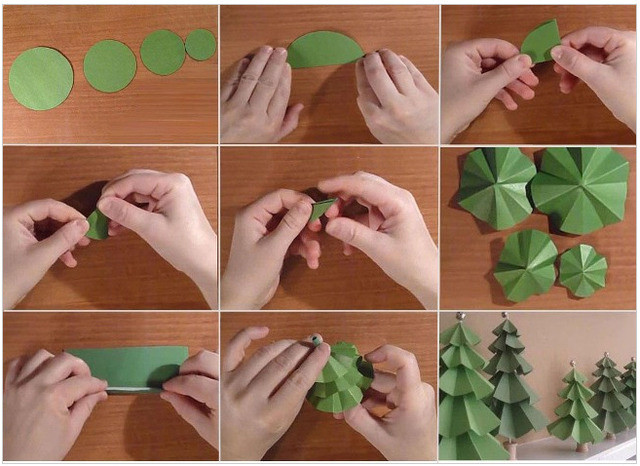
Christmas tree of paper
So, for the assembly you will need:
- Green paper;
- Ruler;
- compass;
- glue;
- scissors;
- A pencil or a tube for juices, cocktails.
Step 1.
Use the compass to draw a few circles on the paper. Each new circle do less than the previous one by 1-2 cm. Choose the number and size of the circles yourself, depending on the size of the herringbone as a result of going to see. The cut circles are the tiers of our future Christmas tree.
Step 2.
Fold each circle in half once, for the second time and for the third time: each circle should be folded three times in half. To make the fold lines clear - swipe the edges with scissors.
Step 3.
Straighten the circles and cut in the center of each hole, which should coincide with the diameter of the pencil or tube - it all depends on what you will use.
Step 4.
Cover the pencil or tube with green or brown paper.
Step 5.
Now is the time to collect the Christmas tree. All the tiers gently string on the base - a pencil or a tube.
Step 6.
The top of the Christmas tree decorate with a beautiful bead or star. Decorate the tree can also be sequined and pieces of foil from chocolate.
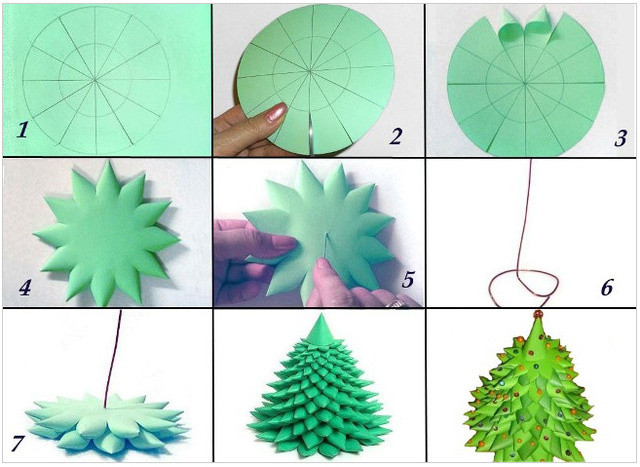
Three-dimensional fur-tree from a paper
So, for the assembly you will need:
- Green paper;
- scissors;
- pencil;
- glue;
- compass;
- Ruler;
- needle;
- wire.
Step 1.
On green paper, draw a circle of sufficient size on the green paper - this will be the lower tier of your future Christmas tree. Next draw another lap inside the first circle, a little more than half the radius from the contour of the first circle. Using the ruler, divide the circle into 12 sectors.
Step 2.
Make an incision along the lines, the depth to the inner (second) circle.
Step 3.
Fold the sector into the cone, which you need to fix with glue.
Step 4.
Similarly, prepare the remaining tiers, gradually reducing their size.
Step 5.
In the center of each workpiece, use a needle to make a hole.
Step 6.
Bottom the wire coil.
Step 7.
All tiers of the Christmas tree need to be assembled on a base - wire. To fix a Christmas tree from above it is possible a cone made of the same paper.
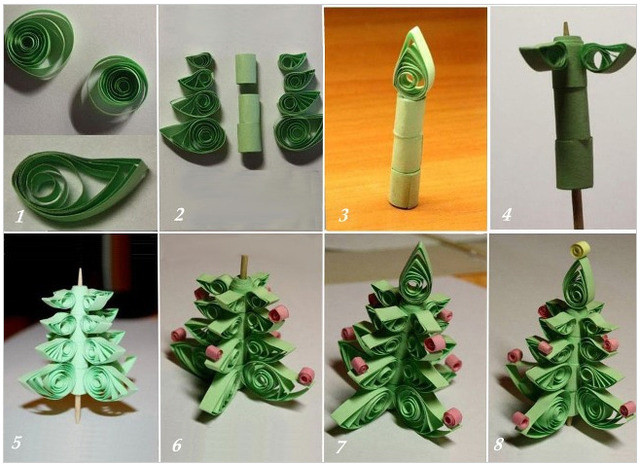
Paper Christmas tree
So, for the assembly you will need:
- Green paper strips 5 mm wide;
- Four strips of 1 cm;
- Red and yellow stripes 3-5 mm wide;
- Toothpicks;
- Glue (instant and PVA).
Step 1.
Use pre-prepared green strips in lengths of 30, 20, 15 and 10 cm. Twist them with a toothpick, then remove and allow the strips to slightly blossom. The end of each strip is fixed with PVA glue and give all spiral forms a drop shape, grasping and slightly pulling one of the ends of the spiral upward.
Step 2.
Tightly wind the wide green stripes on the toothpick and glue the tip to them, not allowing it to blossom. This is the trunk of your Christmas tree.
Step 3.
For the top of the tree, make a drop of a green strip 30 cm long.
Step 4.
Start collecting herringbone by fastening her elements with instant glue. Fix the trunk parts and allow the glue to dry.
Step 5.
Insert the toothpick into the trunk and glue the droplets-twigs. Glue start with the smallest twigs that attach to the top of the tree.
Step 6.
Make toys of yellow and pink stripes, twisting the paper without the aid of a toothpick. You can fix the ends of the strips until the paper is unwound, and you can make the toys a little freer and give them the shape of small droplets. Glue the balls to your favorite branches.
Step 7.
Glue a drop and at its top - do not forget about it! - fasten the decoration.
Step 8.
If you want, you can make a stand for the Christmas tree. To do this, make nine curls of white paper strips. Firmly glue the curls together and fix the tree on the snowy white stand with glue. For full naturalness, the stand can be decorated with cotton.
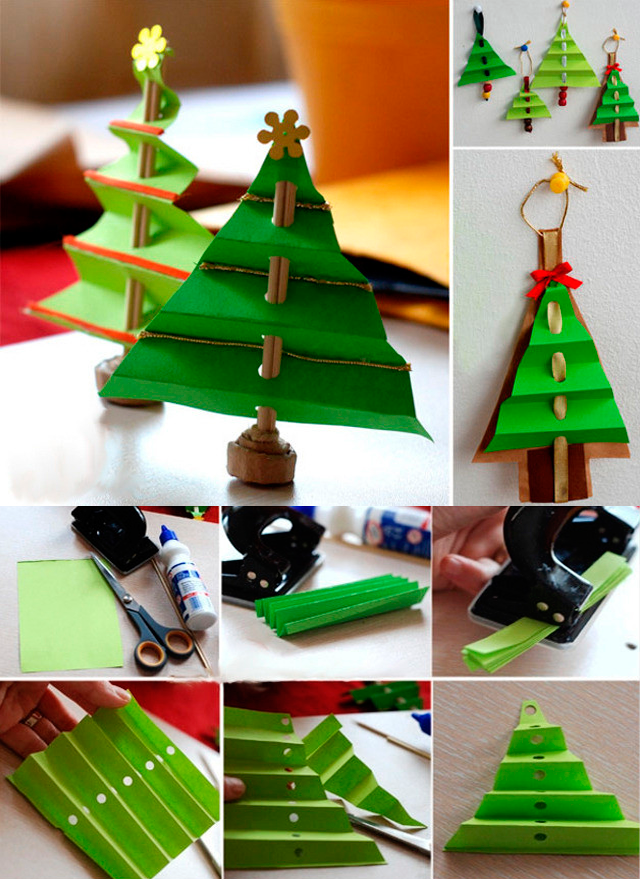
Christmas tree for the new year from cardboard
So, for the assembly you will need:
- Colored cardboard;
- glue;
- scissors;
- hole puncher;
- A small stick with a diameter equal to approximately the diameter of the holes that are obtained from the punch;
- Ornaments.
Step 1.
Take the cardboard in a rectangular shape, fold it several times (as shown in the picture) and in the center with a hole punch make holes.
Step 2.
Then take the cardboard and cut it out "at an angle" so that the artwork eventually becomes like a Christmas tree.
Step 3.
Pull the stick into the hole. If it does not hold firmly, then fasten it to the place of contact with the cardboard glue.
Step 4.
Decorate the Christmas tree. Ornaments can also be fixed with glue.
Christmas tree from the magazine
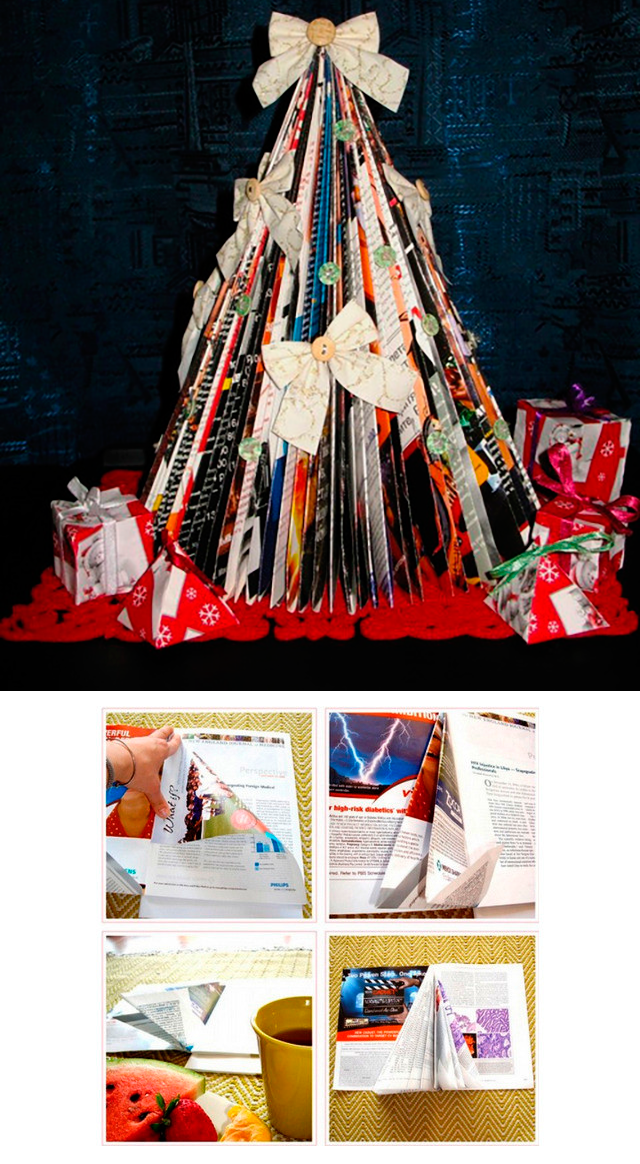
Material for such crafts will serve as one large magazine or several small magazines. If the magazine has a hard cover, it is desirable to remove it.
Step 1.
Start from the upper right corner, bend the page at an angle of 45 degrees.
Step 2.
Bend the sheet diagonally and again in half.
Step 3.
The angle that comes out from the bottom beyond the boundaries of the magazine, tilt upward.
Step 4.
With the rest of the pages do the same procedures and in the end you will get an unusual Christmas tree.
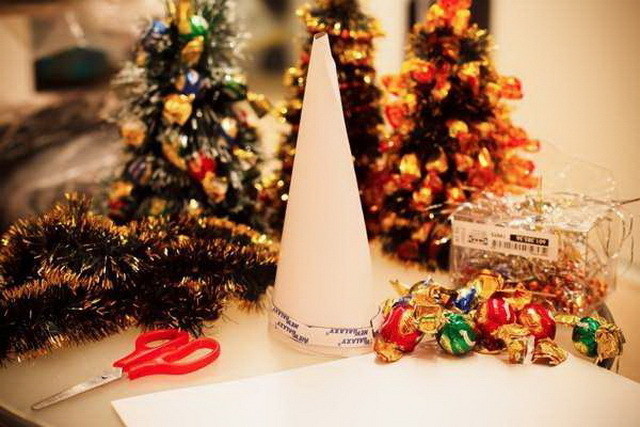
New Year tree of sweets
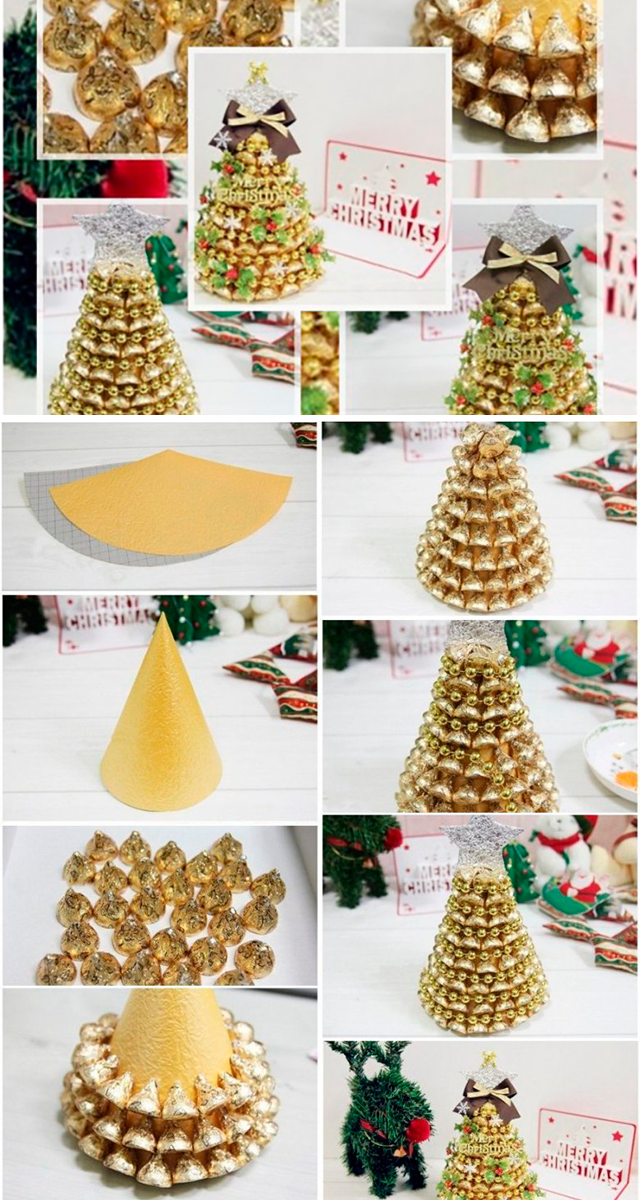
Please note that the color of the wrapper of sweets does not match the color of the Christmas tree decor. If you decide to use the rain, then pick it with a short "pile" to make the sweets visible.
So, for the assembly you will need:
- 500-600 grams of chocolates in a bright wrapper;
- Dense cardboard;
- Adhesive, scissors and double-sided adhesive tape;
- Christmas decor: rain, a small star for the crown.
Step 1.
From the cardboard, make a cone, cut out the semicircle and wrap it. Glue the edges with a super glue that will securely fasten and quickly grasp.
Step 2.
The bottom of the cone is cut into strips, bend inwards and from above, glue a circle that will help to make the base as stable as possible.
Step 3.
If you prepare a Christmas tree as a gift to a child, then inside the cone you can hide a small typewriter or a soft toy. You just need to think about the opening for the herringbone.
Step 3.
Cover the cone with a double-sided tape, remove both protective films. Next, glue a row of sweets from below. Candy to tape should be very carefully pressed, otherwise they will quickly fall off.
That is why candy is desirable to choose light weight. If you decide to use heavy chocolate candy, then glue them to the Christmas tree immediately on the glue.
Step 4.
Make the top of the Christmas tree of candies a small starlet made of wood or polystyrene, then disguise the top of the head with serpentine or tinsel. Your sweet Christmas tree is ready!
Fir-tree of tinsel with own hands
So, for the assembly you will need:
- Tinsel 2 m;
- Sheet of Whatman;
- PVA glue;
- Glue "Moment"
- scissors;
- pencil;
- needle with thread;
- Brush for glue.
Step 1.
On the paper of the paper, draw a circle with a radius of 25 cm. To smoothly draw such a large circle, make the following device. At the end of the thread with a needle tie a pencil, stick a needle in the middle of a sheet of paper, stretch the thread and draw a pencil circle, the required diameter.
Step 2.
To create a cone-base of a Christmas tree, you need only half of this circle, so cut the circle in half.
Step 3.
Connect the edges of the halves overlap and fix them with glue - for this purpose it is better to use the glue "Moment". The base of the Christmas tree is ready.
Step 4.
To glue the tinsel to the base, apply glue PVA over the cone and gently glue the tinsel in a circle. Tinsel is well attached to PVA. So cover the entire cone and allow the glue to dry. Herringbone of tinsel ready!
Origami paper - Christmas tree
Option 1.
Option 2.
Option 3.
In this popular technique, you can perform any figures, including New Year trees. As is done in the origami technique of a Christmas tree made of paper, the video will show better than any words. We offer two options.
Origami paper - Christmas tree
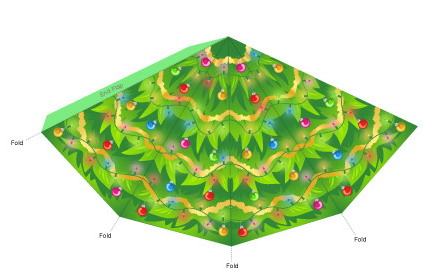
This Christmas tree will require a color printer, paper, scissors with glue, hands and a few minutes of free time. We print the Christmas tree template from paper, cut it out, add it, glue it together.

Comments
When commenting on, remember that the content and tone of your message can hurt the feelings of real people, show respect and tolerance to your interlocutors even if you do not share their opinion, your behavior in the conditions of freedom of expression and anonymity provided by the Internet, changes Not only virtual, but also the real world. All comments are hidden from the index, spam is controlled.