
We make a dragon with our own hands.
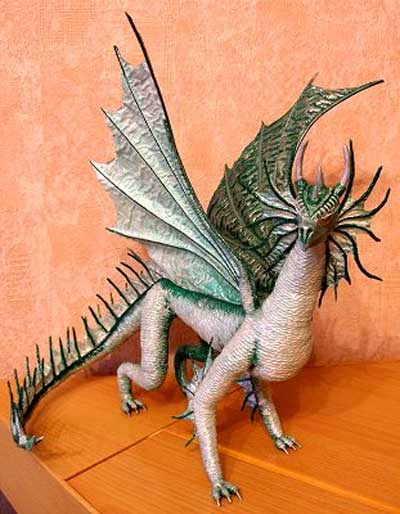
Dragons are fabulous creatures that appeal to both adults and children. If everyone likes them so much, why not make yourself one (or a couple) with your own hands?
First, draw his sketch or choose the image you like , the benefit of the Internet pictures with dragons more than enough.
Now it's time to think about what will be the size of your dragon, as in its body will be located wire frame. Cut the wire for the frame: body, paws, wings.
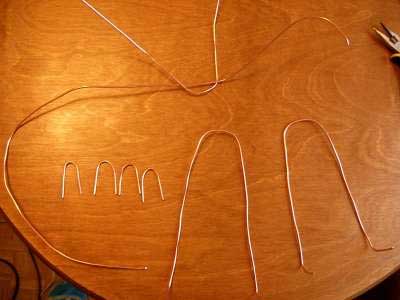
In order to connect the individual parts of the wire with your own hands , you can solder them or firmly stick them with tape, tape, thin sections even with threads.
To weld the frame, remove the varnish from the wire with the help of the skin with your own hands, irradiate the spot (the tin surface is better wetted with solder) and weld the frame.

Give the frame an approximate shape and weld it together.

We will work with the paws: we weld, we cut to the desired length, we cut off the claws and we bend them.

This is how our dragon looks hand made.

At this stage, it is very important to make sure that the legs of the dragon are the same length. It would be insulting to rework a ready-made dragon.
Now arm ourselves with toilet paper and wrap it with our own hands, the frame in one layer. Cover the diluted glue with PVA and let it dry.
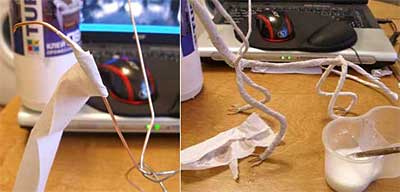
When the glue is dry, we tear off the paper in small pieces, squeeze it ourselves and drag it to the dragon (threads), then wrap the toilet paper over until the thickness of all parts of the dragon we need is obtained.

On the legs we act similarly, only more accurately than on a thick trunk, the hand-made dragon is already acquiring the final outlines.

When wrapping the entire dragon with paper, properly coat it with glue and allow it to dry out.
Usually dragons are covered with scales. In order to create its likeness, you can use a packing rope. It must be pasted onto the dragon's body with a universal transparent glue (for example, Moment). Instead of a rope, you can use flagella twisted from toilet paper. Before gluing the surface, pre-grease with glue.
We wrap the neck and go to the body (we also apply glue on it, but not too much), from the body we go to the tail and fix our rope. We do not pay attention to the empty chest and the ass, let them be paper for the time being.
Cut off a small amount of rope, divide it and already thin on the maty on the base for the wings. Do not forget about the glue.
That's what we get as a result of our work.

We put on a paw a little glue and wrap, we reach claws. Again, we divide the rope into three parts, wrap each finger, reaching the claw, turn the dragon and connect all three strings of rope into one. With a rope we make a loop around the paw and we adhere. Here it is, the ready foot of the dragon.

It remains to seal the rope with all the places on which the paper is still visible. Let's start with the handmade dragon's chest. Cut off from the rope a piece, exactly equal in length to the remaining "hole" on the body of the dragon, and begin to lay it, greasing with glue. This is probably the most tedious and dirty stage of the work on the dragon handmade. Behind the paws and near the shoulder blades, we press the threads harder, so that the depressions have turned out.
We continue to glue the rope, we make flagella in the size of the remaining holes. At the tips we put on a drop of glue, twist, glue. So we finish the work on the dragon's chest.
Now we make rope vstavochki on the dragon's hind legs.
The gap between the hind legs has not been pasted, and we seal it, likewise.

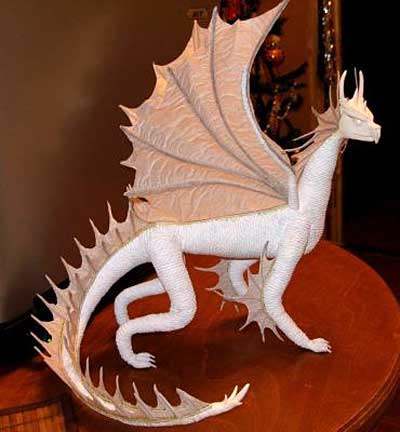
When the entire dragon is wrapped, apply a primer and leave to dry. When it dries, it is better to cover the dragon with acrylic paint (for example, white), so that it is solid.

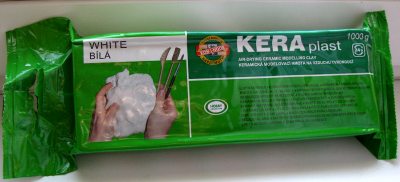
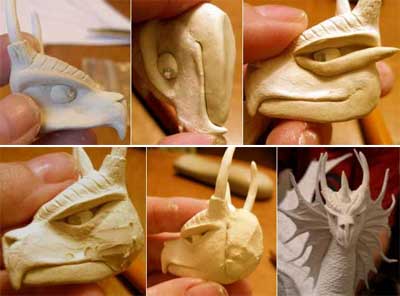
Now it's time to sculpt the dragon's head . For these purposes, you can use a special self- hardening air KERA Plast , plastic or similar material for modeling. If the masses for modeling are very tight, then the dragon's head can be made from papier-mâché or salted dough.
First you need to give a general shape to the head, make the fingers a notch under the eyes, form a beak (it will be a nose), a toothpick make holes and give the desired shape. Top on your head, put on a cake and squeeze everything, smooth the joints, shape the eyebrows.
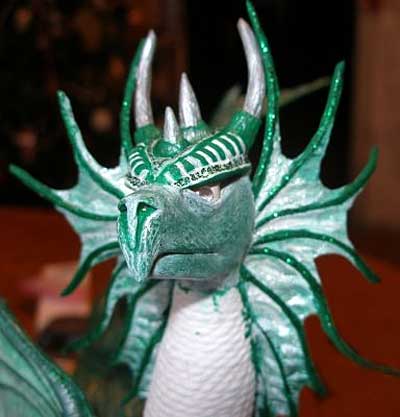
On top of the head, attach the previously prepared wire (curved in the shape of the head and horns). Under the wire and from above make sausages and then everything is leveled. After you put the head on top of the desired shape, immediately apply a toothpick drawing. On the wire we paste the paste for modeling and we form the horn, from below we form the sausage and spread it around, from where the horn grows. It should look like a photo. While the paste is not frozen, with a toothpick or needle, scratch the horn and the adjacent parts of the head to give the dragon realism.
We make a notch on the head, where then we will place the middle horns.

We begin to make the eyes of the dragon. To do this, roll a small ball and press it into the places for the eyes, which we pre-prepared (pits). Immediately insert a strasik (or bead). If it does not stick well, glue it. Blind the lower jaw and connect to the top. Roll the sausage and stick it from below the eyes of the hand-made dragon to create a predatory squint.
Sausage under the eye spread, level (finger). Put cheeks and try to shape cheekbones. If necessary, remove excess paste for modeling. Back the neck of the dragon with a cake from the mass for modeling and give a final look. If next to the head of your dragon, too, there are such needle-like decorations (as in the last photo), then make cutouts for them.
Head a little scratch with a needle, giving the effect of the skin. The head is planted on the remaining untwisted end of the wire around the neck.
We begin to make wings, "plumage" ridge and needle decorations next to the dragon's head. All of them are made by a single principle.
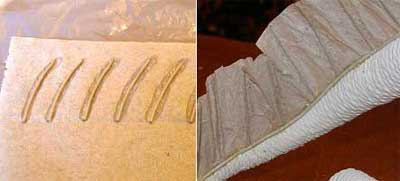
To make wings, lay the dragon sideways on a piece of paper, circle the overall shape of the future wings. Dory the streaks. Obtain a pattern of dragon's wings placed under transparent polyethylene. On top of the veins, spread out and glue the flagella, twisted from toilet paper or newspaper, and pat them with diluted PVA glue. On top of the flagelles, we paste toilet paper, paper towels, napkins or paper (sold by rolls). If you use toilet paper, try to ensure that the joints pass along the flagellates - veins of the wings, and not between them.
Turn, glue on the other side of the second layer of paper, so that the flagella - streaks are between two layers of paper. We glue the paper with PVA glue (at the same time small creases on paper should be created), wait for drying, carefully remove the wing from polyethylene. We cut the wing exactly on the pattern and glue to the dragon.

We make a ridge. Almost the same as the wings. On the toilet paper we put flagella at a certain distance, so that they are more often to the tip of the tail and less often to the neck of the dragon. Cover with a second layer of toilet paper, smear PVA, dry. To glue this strip of toilet paper on the dragon's ridge, we first glue a long flagellum from the toilet paper or newspaper approximately in the middle of the ridge, glue the strip to it, on the other side of the strip we glue a second flagellum supporting the protruding ridge.
The ridge is cut to the desired length, cut out the desired shape.
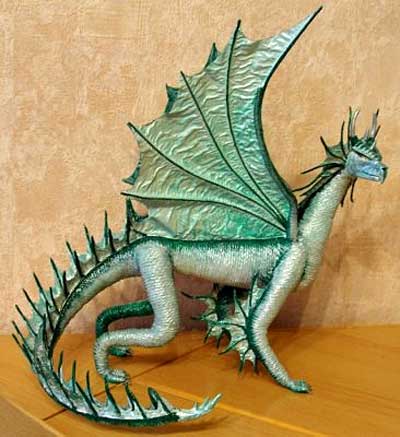
Now the dragon has only to be painted and varnished.

Comments
When commenting on, remember that the content and tone of your message can hurt the feelings of real people, show respect and tolerance to your interlocutors even if you do not share their opinion, your behavior in the conditions of freedom of expression and anonymity provided by the Internet, changes Not only virtual, but also the real world. All comments are hidden from the index, spam is controlled.