
How to build a boat with your own hands. Self-made motor boat.
For the basic project, the boat project "Som" was adopted. But I did not want to build a cabin option (although I can regret it). "Somik" Ivan Georgievich really liked. Dimensions of "Soma" seemed small, and the length was increased by 200 mm. I tried to make a model by drawing from the project - it turned out to be a mess. Errors in the drawings are and modelka turned out to be crooked.
All this time, the search for "Carene" hung on the desktop and at home and at work. There were a lot of options. I did not like everything - the collapse of the sides did not fit the contours of the nose, the height of the board did not like, and so on. And in the courtyard is the new year 2006. I feel - on something it is necessary to stop, and the contours so could not pick up on the program to your taste. There's nothing to do - AutoCAD is a great thing. Generated in the "Carena" the contours that most liked, AutoCAD sucked and this three-dimensional boat began to chicken and pull.
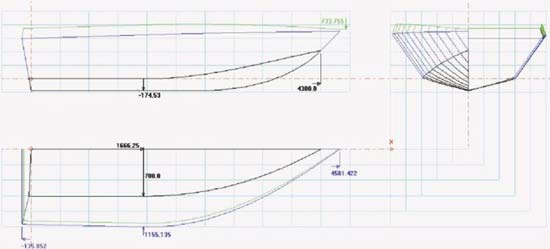
Fig. 1. This is the original version, which I liked the side view, but the collapse of the sides is very large, which could not satisfy.
I was busy for a long time, but in the end something happened. Many will have a question: "And how to do it?" The question is quite legitimate. But then came to the aid of a younger brother. He builds the paragliders (they started together when they studied at the institute). The program has a self-written program, which is scanned using the triangulation method. We drove corpses there and turned. Something happened. But there is no trust. Checked on Karen. The scans obtained in Karen were compared with the scans obtained with the aid of the brother program. The discrepancies were not more than 0.1 mm. In short, we decided that such accuracy would satisfy us. Out of the box from the designer "LEGO", the modelka was stuck together with the yarn. It turned out well. The hull was scaled to a length of 4.6 m and a width of 1.75 m.
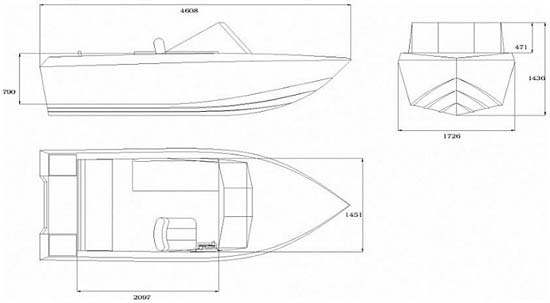
Fig. 2. This final version was adopted in production.
The drawings show the layout of the cockpit. In general, the boat will be used for pokatushki and walks and to a lesser extent for fishing. In the doubts and questions passed winter and spring, the project overgrew with drawings and diagrams. It's time to buy materials. My wife was completely upset, because all summer I was going to build a boat, but, being a wise woman, even to some extent supported. I bought plywood, epoxy, fiberglass, some kind of instrument, and started work.
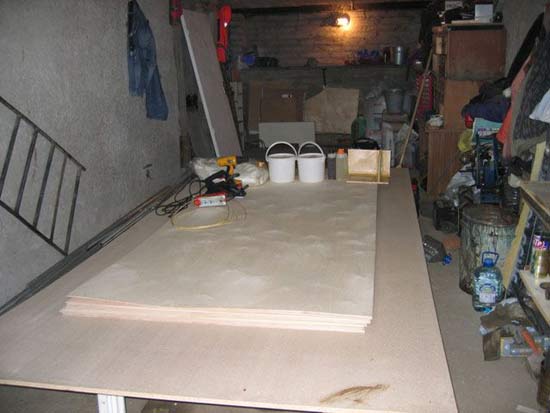
Fig. 3. Harvested materials and tools.
Joining the plywood into a mustache did not become a problem, for two days four sheets of 4.8 m long were glued together. For the patterns without retreat along the length fit well. The details of the bottom and sides are cut out. There was a question with the transom - an oak board just on the market can not buy. I searched for a long time, but I found where the edging board of the required thickness is sold. Cut out the parts of the transom and glued together according to the following scheme - the outer layer - 8 mm. Plywood, fiberglass layer, oak board, fiberglass layer, inner layer - 6 mm. plywood. It turned out to be hard. Oak board is not strong. But what's done is done. To alter the transom did not want to, and the margin of safety never hurts.
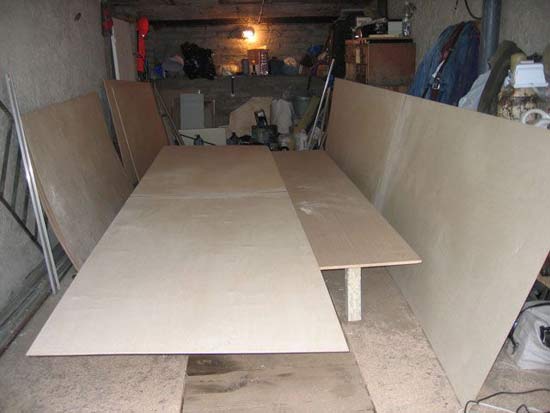
Fig. 4. Glued sheets. It's simple.
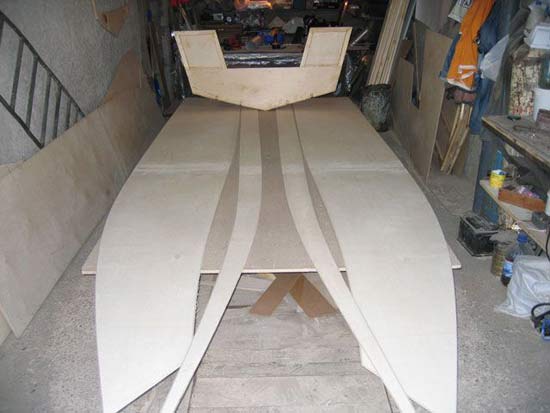
Fig. 5. There is a transom, heavy, a reptile, it turned out.
But it all turned out to be a flower in comparison with the process of making all the frames. Now I understand that the number of frames turned out to be too much (I could not kick my feet!), But then I wanted to make it stronger and more reliable. I spent a long time with them, until all the details are cut, while you glue it together, until you wrap up everything with screws - I thought I'd throw everything to the devil! Patience was running out, but pride did not let it all go. Work slowly but surely continued. When the last frame was assembled, I really wanted to get drunk to hell, but I did not allow daily driving by car.
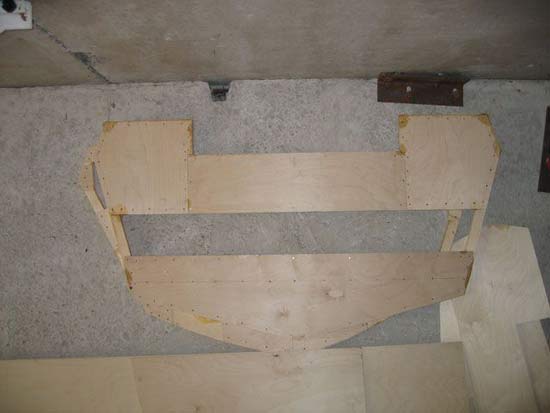
Fig. 6. A pair of frames, it is necessary to make 8 more pieces.
The long-awaited moment has come when the boat can begin to take shape. Began to assemble the case. One of this process certainly can not be mastered. The brat was called to the rescue. The assembly of the bottom did not cause the slightest question: everything was assembled, twisted and disintegrated with enthusiasm!
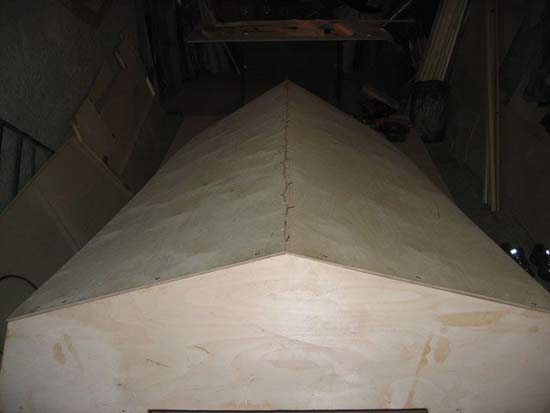
Fig. 7. Bottom and transom. Everything was assembled as it should.
But with the boards had to suffer. At the same time, both sides could not be placed - very large parts - can not be held. They began to make one board. Started with the nose. To the stern got a deviation of 8 mm - well, I think everything .. .. na! Have come! The details are either incorrectly cut out or incorrectly designed! But my brother is more relaxed, he proposed a second board to try to put from the stern. Have tried - all has risen millimeter in millimeter! So I think, therefore, the error is not in the details and drawings, but in the curved curves! The first side was removed and quickly reinstalled. Everything has risen!
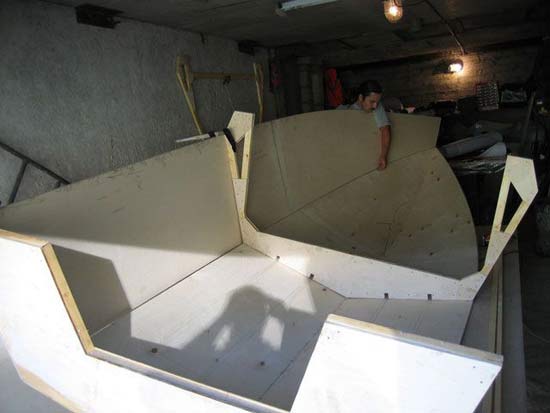
Fig. 8. Brother Michael adjusts the first, not correctly risen board.
Beauty! When the hull was assembled, it was understood that the boat was big. Immediately began to overcome doubts about the correctness of the chosen dimensions, is not it a very large boat decided to build? But there is nothing to do, except how to proceed. My wife came, looked, figured out where she and her son would sit in the boat, and said that she liked it! Therefore, now it is simply obliged to bring the matter to an end!
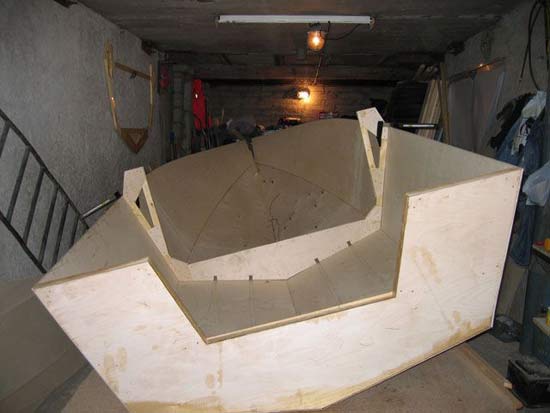
Fig. 9. All is collected while only on twists, on frames are shown clamps.
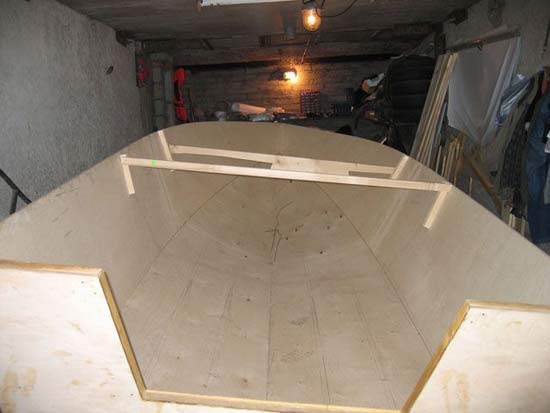
Fig. 10. Ribs are inserted in place of the frame to make the sides collapsed correctly.
For the calculation put in the central frame (Figure 9) - stood in place as if here and stood. This gave strength and confidence. Now we have to make fillets at all seams, as advised by more experienced comrades. For the concept of how to interfere - I mean epoxy and aerosil, I had to make a small corner of the plywood. Prepared a special jar, poured epokisdki, hardener and poured aerosil. E-mine, who knew that this aerosil bulks, like water, and by weight it is ten times easier! In short, I had been in trouble for about forty minutes. Interfering aerosil in the epoxy turned out to be a dreary matter .;
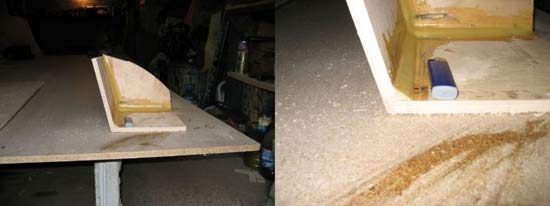
Fig. 11. Here is a sample, such a fillet. Lighter for size evaluation.
But in the end everything was mixed up and the experimental sample was stitched and glued together. The design was strong enough - they broke only by dumbbells. Confidence that everything is possible even more intensified. In the future, mixing of epoxy and aerosil was carried out using a bottle from under the water and a mixer. After blurring all the seams, the body became somewhat stiffer, but still remained mobile.
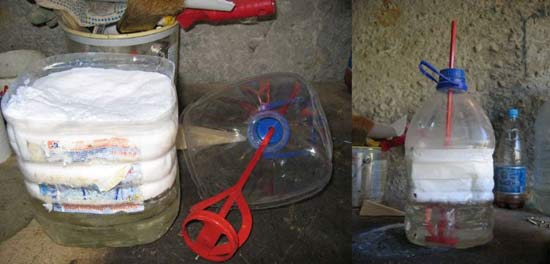
Fig. 12. Here such an adaptation greatly saves time while stirring epoxy and aerosil.
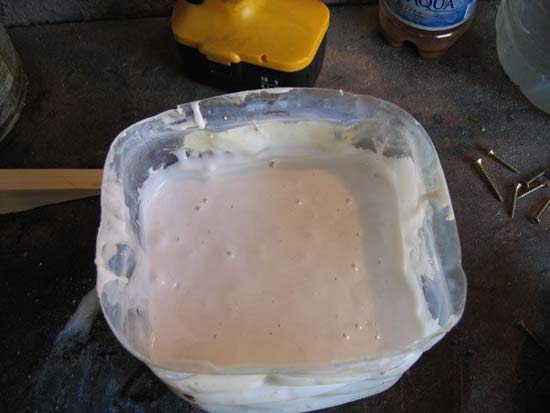
Fig. 13. The mixture resembles the consistency of m-m-m ... probably village sour cream, i.e. Thick sour cream.
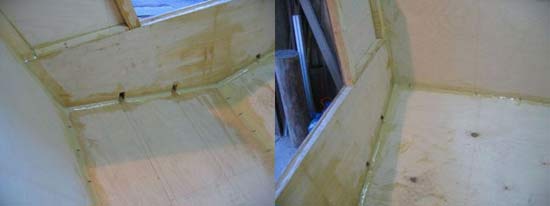
Fig. 14. On the right photo you can see the markings for installing stringer.
It's time to glue the seams with fiberglass. Tapes of fiberglass could not be found, had to cut from a roll. The case is also dreary, but he mastered it. After sizing, the rigidity of the body increased. Photos of this process unfortunately I do not. Working with epoxy does not contribute to photography. Inserting frames is not a tricky business if there are no stringers.
I also planned to install four stringers on the bottom (2 stringer per half of the bottom) and one stringer on the board. This is where the real problems started. Simultaneously, bending 6 stringers and installing frames was a very difficult matter. While the frames were being installed in the stern and central part of the boat, everything was more or less normal. Then it came to the bow, where the bending of the sides and the bottom became large. It was here that I had to swear a lot and to remember a "good" word with all this technology "stitch and glue". It was very difficult. More precisely, it is difficult to say!
The three of them installed the nasal frames for three days. He smeared with glue from head to toe. In short, it was concluded that large boats with stringers should be collected only on a slipway using classical technology.
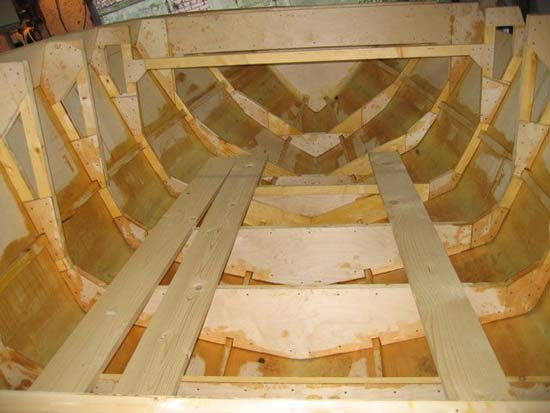
Fig. 15. That's what happened.
Pages: [ 1 ] [ 2 ]

Comments
When commenting on, remember that the content and tone of your message can hurt the feelings of real people, show respect and tolerance to your interlocutors even if you do not share their opinion, your behavior in the conditions of freedom of expression and anonymity provided by the Internet, changes Not only virtual, but also the real world. All comments are hidden from the index, spam is controlled.