
Amplifier with your own hands in retro style.
 Somehow at one point I finally got rattles, grunting and wild distortions from not serious computer speakers. I went over a few options, but unfortunately none of them did not suit me either for sound quality, or for functionality, and that is not unimportant - for design. Voobshchem had to remember the young years, when I was an avid ham radio and try to do something passoyu most ...
Brief description of the amplifier and its characteristics:
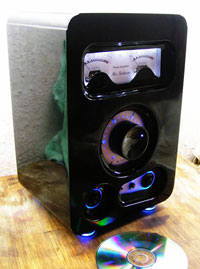
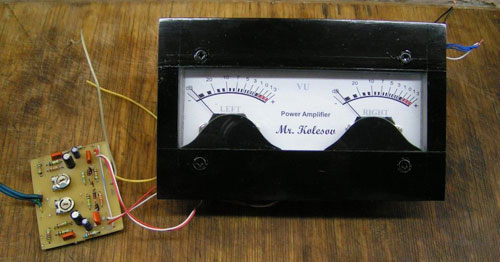
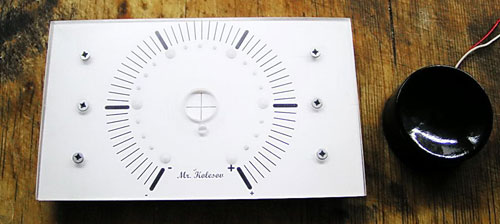
The power of the amplifier is 2x25W, it is made on TDA 7265 chips. This is the main amplifier, the TDA 1517 is a 2x5W headphone amplifier, these are the main ones. Its superiority is certainly evident even in the output power indicators. But I did it not only for the ears, similar copies that are on sale do not meet my requirements at all .... and including the convenience of operation. For example, to connect headphones with a thick plug Jack 6.3 mm, it finally can a whole epic with adapters and other nonsense, not to mention that they can not fully with decent quality, it's simple to simply pump out these earphones. The appearance of the purchased products leaves much to be desired and these boxes you want to remove under the table, so that they can not be seen when, where it is inconvenient to turn them on, this amplifier is without this disadvantage, because it turns on and off synchronously with the computer. All illumination is turned off by the button on the back wall in order not to interfere with using the computer in the dark, after the next power-up it automatically turns on again. Buttons on the front panel "NETWORK" and disconnecting and turning on the speakers.
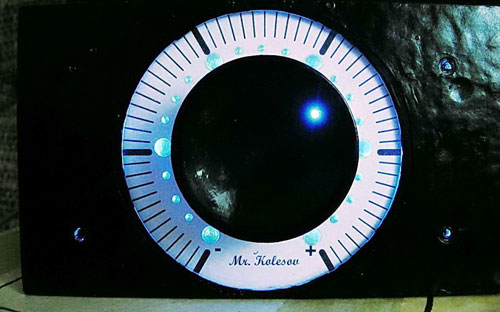
The indicator wanted to make it look like the indicators of the famous amplifiers of my youth. Inspired by the memories of turbulent times, he began to work.
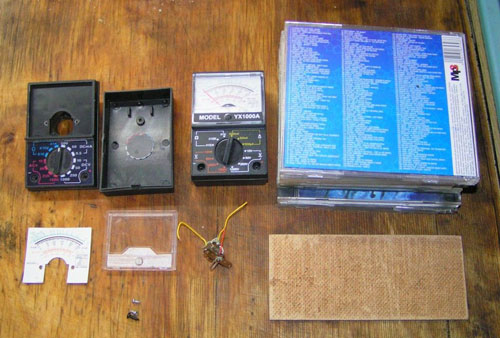
A stylish indicator, which I would like, was not possible to buy. It was decided to perform it himself, from specially purchased Chinese testers. Milliammers are extracted from them, red arrows are repainted in black.
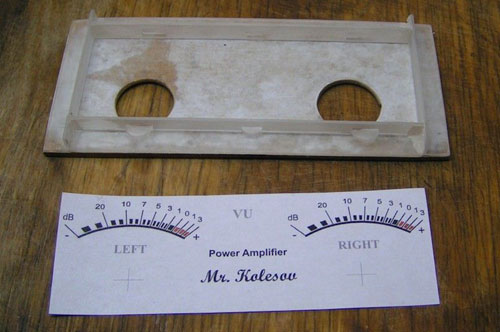
The scale is drawn in the Front Designer program, with further refinement in Korel Drav, because the first frog is friendly with different fonts, but it was necessary to write more interestingly
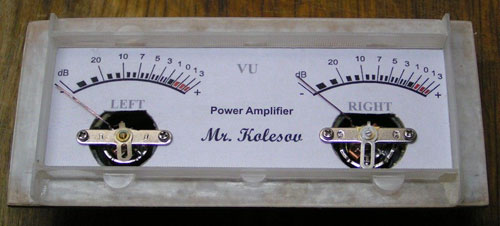
Fitting indicators. Then they are removed far away to the final assembly of the device (very delicate details, it is easy to spoil).
For control, the voltage amplifier is soldered so that there is no effect on the sound path and the work was correct. We check - everything is crashing, it works perfectly. Scheme found in the network from some Soviets Soviet mafon, in my Spring I did not remember.
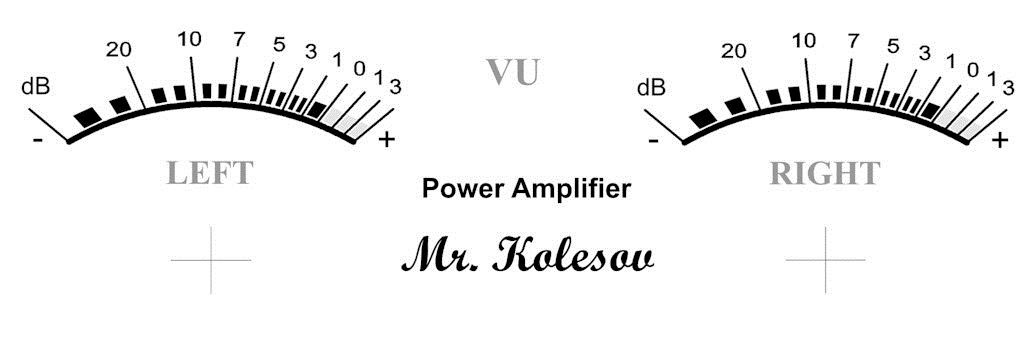
Here is the scale, the inscription mr. Kolesov - this is my name from modesty will not die ... and I wanted some kind of name to do .. copy some brands in my silly. And it's so unusual to pin up friends ...
The regulator of course wanted to make a classic, a big round, not necessarily a button .. So that when touched and rotating it felt like you were waving a thing, and not some kind of toy Chinese junk ... On the encoder, I lost control by myself, I needed a backlight on the handle, And it will not turn endlessly with the wire. In general, I did not bother and decided to make an alternating resistor. In the end, if he starts to squeak it, change it for 5 seconds.
And so to your attention - the next perversion ..
After a poke around the house I came across a tube of cream. After negotiations with his wife, she presented me with a cover for further torment.
According to the idea, the illumination on the handle was planned in order to be able to quickly and easily determine the position of the regulator (especially in the dark). Drilled a hole 1mm, behind I will attach a light later.
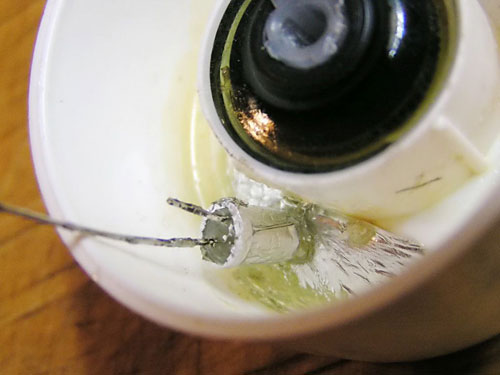
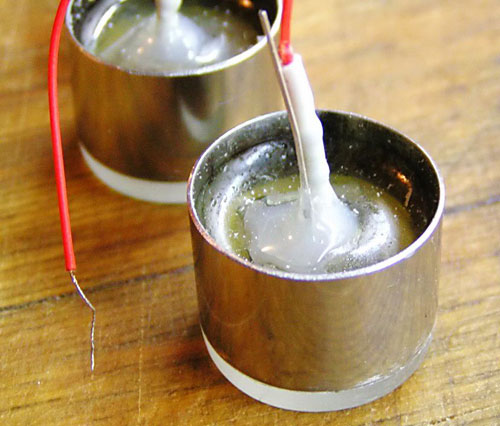
On the epoxy we put the LED on, pre-pasting it with foil (it's very bright I did not want it to shine through the walls of the handle), while the excess resin that emerged into the hole formed a light guide, the smudges come off and the surface is perfectly smooth, it's very difficult to guess where the hole is until you light it Light.
The scale is made in the Front Designer program and the inscription and symbols in Korel Drava. In the designer, there are not so many options.
The scale printed on glossy paper is placed between 2 sheets of organic material, everything is connected for subsequent stages of work.
It turned out not bad. The principle that I wanted - everything turned out.
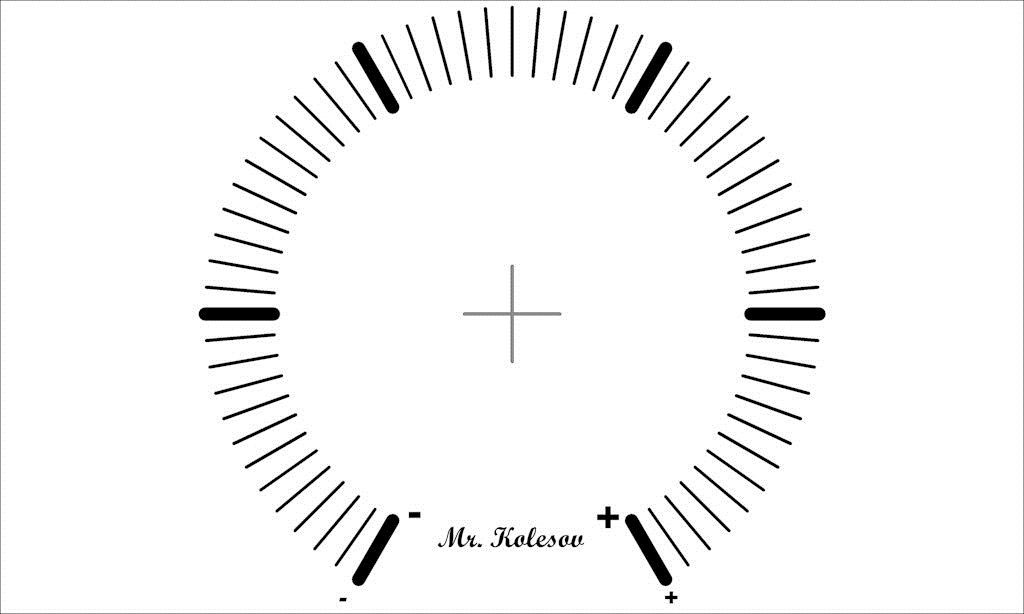
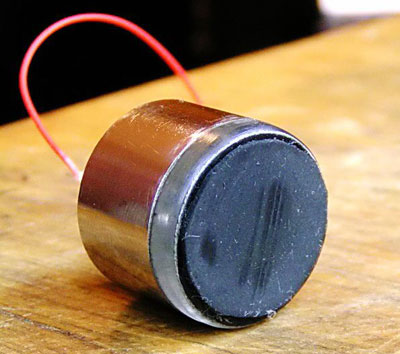
Supports for this product are decided to be made in the classical design style of radio equipment - chrome-plated, but with a little zest ala UFO. At the base of the legs was planned a blue backlight.
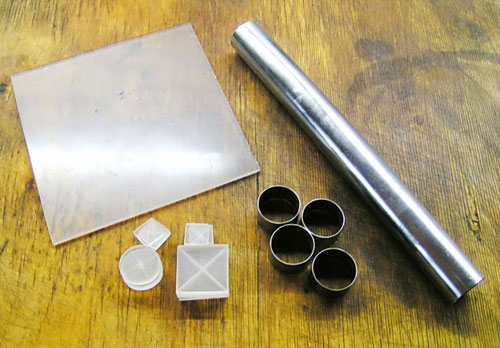
It was made from the fact that there was also a balcony in a pile of rubbish. Chromed furniture pipe 25mm, organic 3mm (fitted korefan), lights certainly went to buy + glue (superglue and epoxy).
The blanks are cut glued and glued in them, incorrect for transmission of the light flux, but about this later ..

The layer of organics of the round form is provided for - that then at the pouring the epoxide does not leak out .... The billet from the pipe is tightly put on the base.
The details are dry. The finished plexiglass is removed, the edges are neatly polished so as not to spoil the chrome on the metal part of the leg.
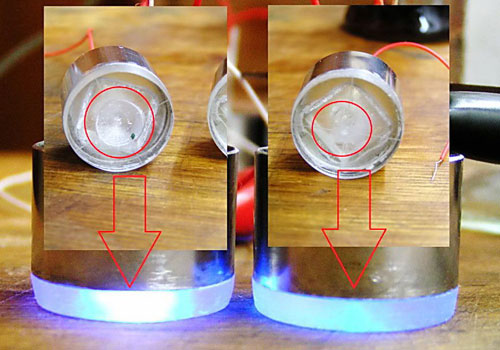
Trial inclusion of the luminaries was not impressed and it was decided to make a scattering lens .... The light falls on it and dissipates in different directions. This combined photo shows the scattering effect, made by simple manipulation of the drill ...
In the final stage, rubber gaskets were made from the bicycle chamber ..... Aluminum foil was glued on the liner on the inside, (to reflect light), everything was glued to a transparent moment.

Comments
Commenting on, remember that the content and tone of your message can hurt the feelings of real people, show respect and tolerance to your interlocutors even if you do not share their opinion, your behavior in the conditions of freedom of expression and anonymity provided by the Internet, changes Not only virtual, but also the real world. All comments are hidden from the index, spam is controlled.