
Amplifier with your own hands in retro style.
Part 2.
Switches and connectors at a minimum , only the most necessary. Why increase the power of extra gadgets? All settings are in the sound card.
Switch "Network". Speaker switch, headphone signal is constant independent of whether the speakers are turned on, or not - this is also part of the planned plan. Now you will not find an amplifier with such a scheme, even serious receivers do according to the principle "put headphones on and there is no signal on the speaker", and before all the amplifiers were made in such a scheme, as I did. I do not know to whom that can conveniently and vice versa, but for me such a signal distribution scheme is very relevant.
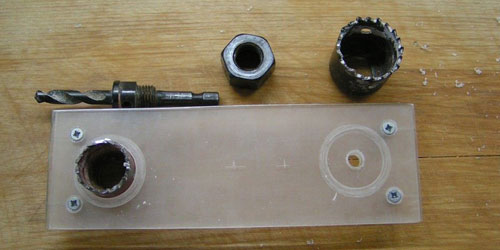
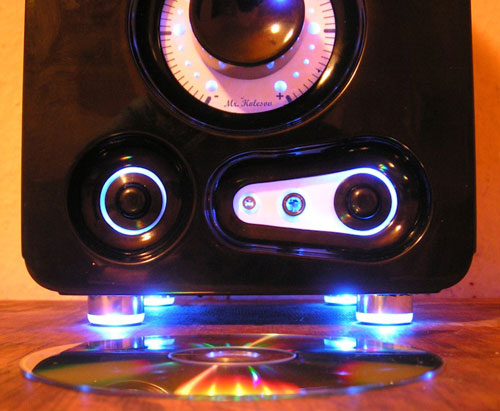
Holes for the switches are selected by crowns in wood. In the same way, a crown with a larger diameter selects a skirt around the hole in order to emphasize the switches with a highlight (the scraped and untreated surface of the organics lightens the light).
Also installed are headphone jacks. And necessarily different diameters Jack 3,5 mm and Jack 6.3 mm so that you can not sweat with any adapters. With which plug is a headset with this and quietly without zamorochek stick.
Paint first silver to evenly scatter the light and then paint to not highlight everything that is around the panel.
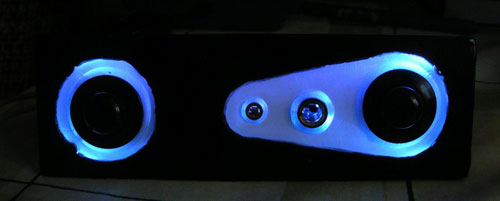
4 lights and here's the final result, inside the headphone jacks, too, by LED for the overall picture.
In fact, all the electronic trifle was found at home, only the amplifiers and switches with headphone connectors were bought specially. The boards did and developed by itself, except for that - that for the indicator, I found this one on the network. Since I already have a little experience in building electronic devices, for me it was not very difficult. Even I would say it was interesting to remember youth.
The amplifier is assembled, the TDA 7265 chip is assembled but the Dashit with minor modifications for its needs, it strikes honest 2х25W not HI-END, of course, but for the computer to ensure that the ears are satisfied quite enough, in the end if you want something more serious, then there is a digital output in the computer, and It can be co-opted with the receiver. The relay switches the speaker (the button on the panel only turns on the relay). This is not unreasonably due to the fact that the relay contact is more reliable than the switch. I already know this from my own experience ....
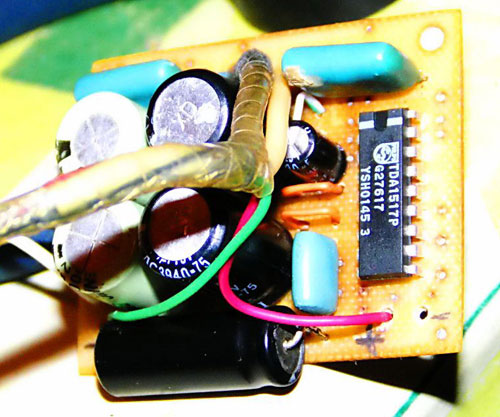
For headphones made a separate small 2 × 5W power amplifier is too big for power of course, but 100% pumping any headphones, listening to powerful large headphones left a positive impression, the chip heats up at a high volume quite strongly, so then at the final assembly I think to stick a small heatsink from sin . I made a separate amplifier because I did not want to see limiters like resistors in the audio path, etc. Which would have to be set if we take the signal from the main amplifier. And then the signal immediately after amplification arrives at the sound emitters without restriction, which positively affects the quality unconditionally.
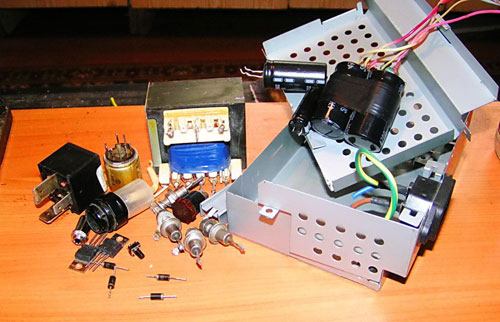
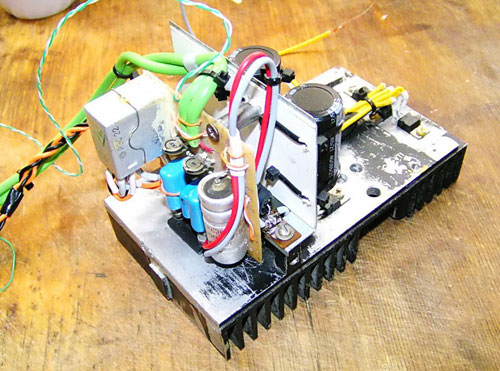
A set of parts fuck power supply. The case from some kind of printer found to "useful things" at home, the transformer fitted the korefan (by the way, he had a separate awesome thank you for such an element. The trance, despite its small size, showed unexpected results: when 25V it stably heated without heating 10A !! !) The photo also highlights the starter relay from the car. Also found at home, they are supposed to turn on the amplifier using a computer. We are using a 12V computer and voila .. This is not to sweat every time the amp is turned on and off, it will be controlled from the computer and work in sync with it. For normal operation without a computer, I'll put a switch on the rear wall that shorts the relay contacts and excludes it from the circuit.
With the body had to tinker, but since this face of the product, it was worth it.
The EAF plate is found again in a pile of rubbish on the balcony, left from some old furniture and left as a useful sign and can come in handy ... which actually happened.
Having drunk the details in size, he twisted it all into self-tapping screws. Joints before assembly missed with glue for reliability.
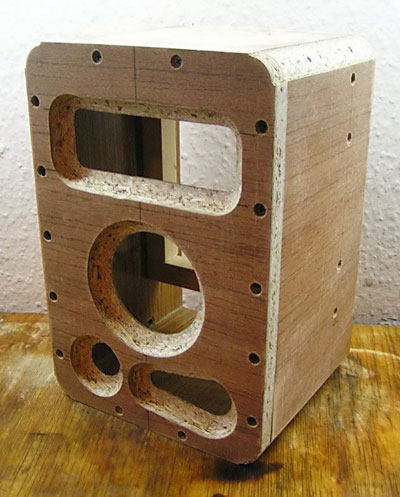
Cut openings for the installation of controls and displays. Raw edges do not look very much. A manual milling cutter has been machined. To process it was necessary in some approaches to receive ideal uniformity of all faces.
To fix the back wall are installed bars, a large margin from the edge was made in order to hide the cooling radiator and all the elements of wire commutation, etc. Due to this, the amplifier can be placed close to the wall.
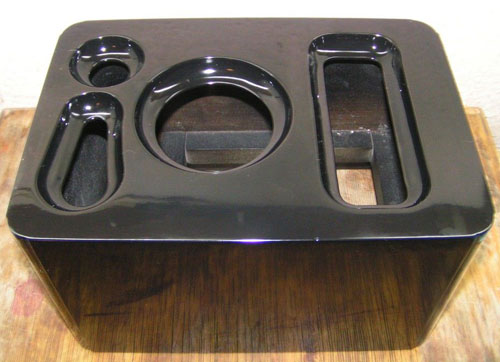
The stages of puttying and painting have been completed, the puttying is made by polymer filler with the addition of PVA glue for good retention on the surface, the soil after each layer of course. Painting the paint NC and varnishing varnish НЦ. Subsequent polishing of the coating with polishing paste and finish polish for the car body. As a result, get a beautiful polished surface, which turned out steeper than on a piano or piano.


Comments
When commenting on, remember that the content and tone of your message can hurt the feelings of real people, show respect and tolerance to your interlocutors even if you do not share their opinion, your behavior in the conditions of freedom of expression and anonymity provided by the Internet, changes Not only virtual, but also the real world. All comments are hidden from the index, spam is controlled.